I have painted the engine bay and front fuselage section by firstly applying a base coat of Gunze 318 Radome. Once dry I applied artist oil paints using 70% Raw Sienna and 30% Yellow Ochre and brushed it on with a small stiff brush. The firewall is painted with Humbrol 27001 Aluminium, this was air brushed on. The metal brackets are painted using a very fine brush and black printer ink (ink jet printer). Once everything was dry I sprayed two coats of Humbrol Satin Cote. I fitted four Grandt Line bolt/nut/washer sets to the outside of the frame where the engine mounts are located and painted them using Mr Metal Color Iron. The ammo drums are painted with Mr Metal Color Iron then lightly buffed. Brass pieces are painted using Mr Metal Color Brass and again lightly buffed.
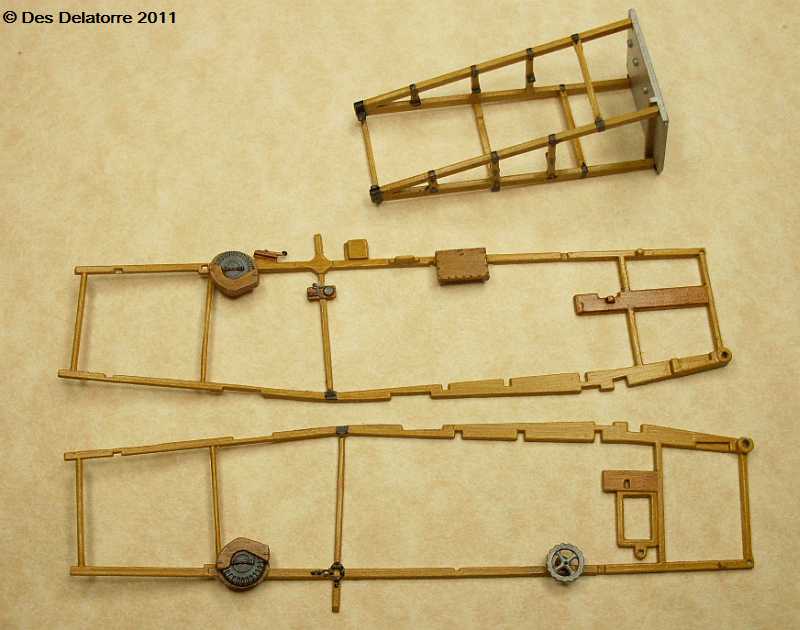
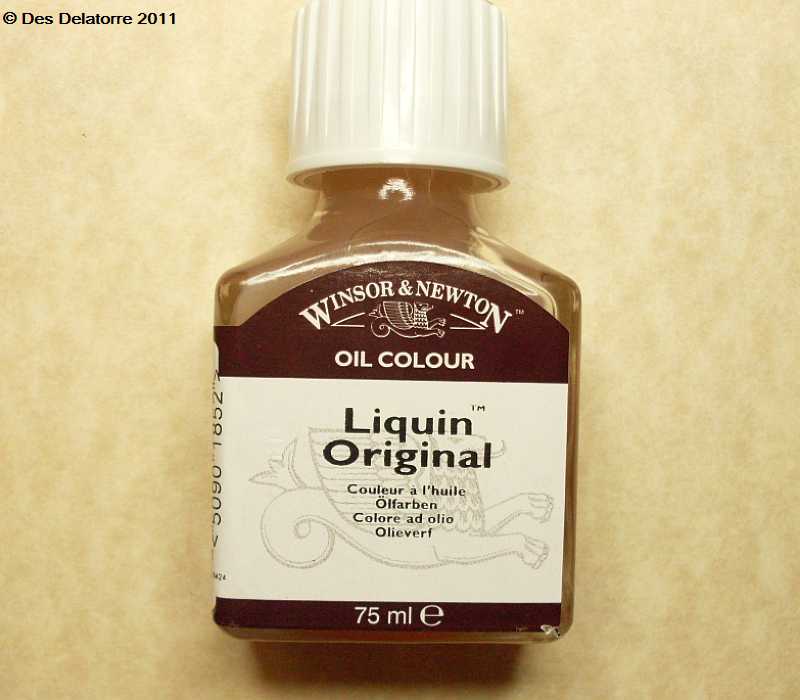
I like to use different colours for the timber as no two pieces of timber are exactly the same colour. I can’t give an exact formula for each colour, I mix different oils to obtain a hue that I like, but as a general direction I use the following oil paints. Raw Umber, Burnt Umber, Raw Sienna, Burnt Sienna, Yellow Ochre, Vandyke Brown. To assist in the drying process I add a product by Winsor and Newton called Liquin Original, it not only accelerates the drying time but improves the flow and workability of the paint, the paint is usually dry within 24 hours.
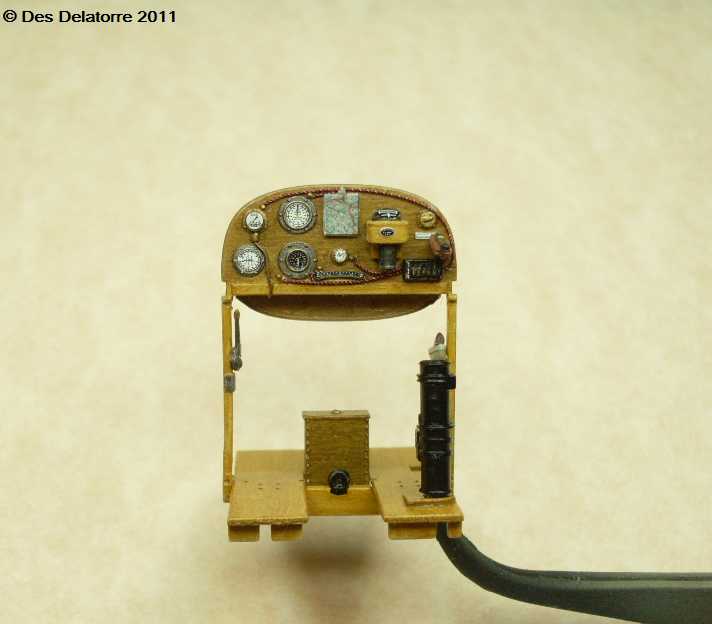
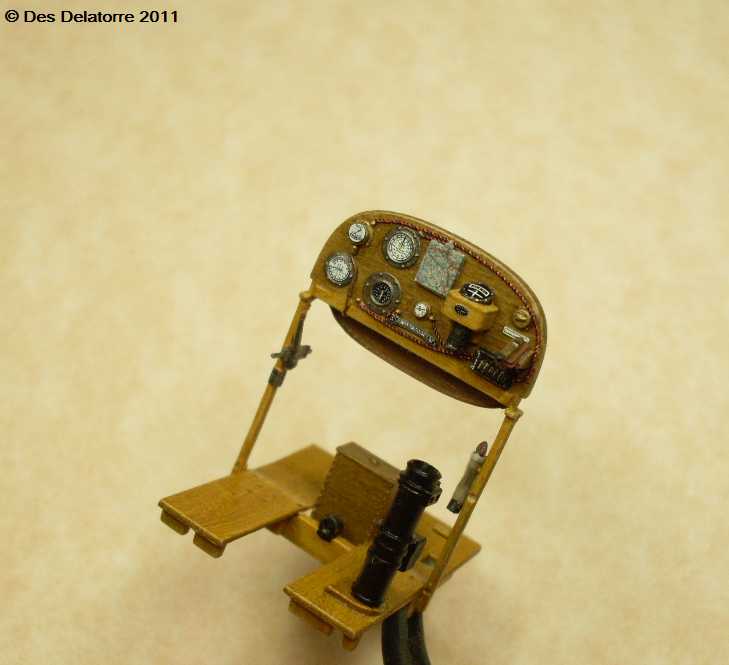
The near completed instrument panel, still need to add the “glass”over the instruments. The electrical cable running around the panel is made from 0.15mm copper wire coloured red using a permanent marker and 0.1mm wire coloured black using a permanent marker. If you use the same size wire the red will be overpowered by the black and will be hardly visible. Tightly twist the two wire together and position on the panel, I used a small drop of CA in various locations to hold it in place. I drilled a 0.4mm hole through the switch panel on the bottom right to allow the cable to pass through, makes installation easier. The instrument bezels are painted with Mr Metal Color Stainless then lightly buffed, the brass is painted with Mr Metal Color Brass along with the cable terminals. All black bits are painted using black printer ink. Wood work is done with a base coat of Gunze radome then a mixture of different oil paints. When everything was dry the whole lot was then sprayed with two coats of Humbrol Satin Cote.
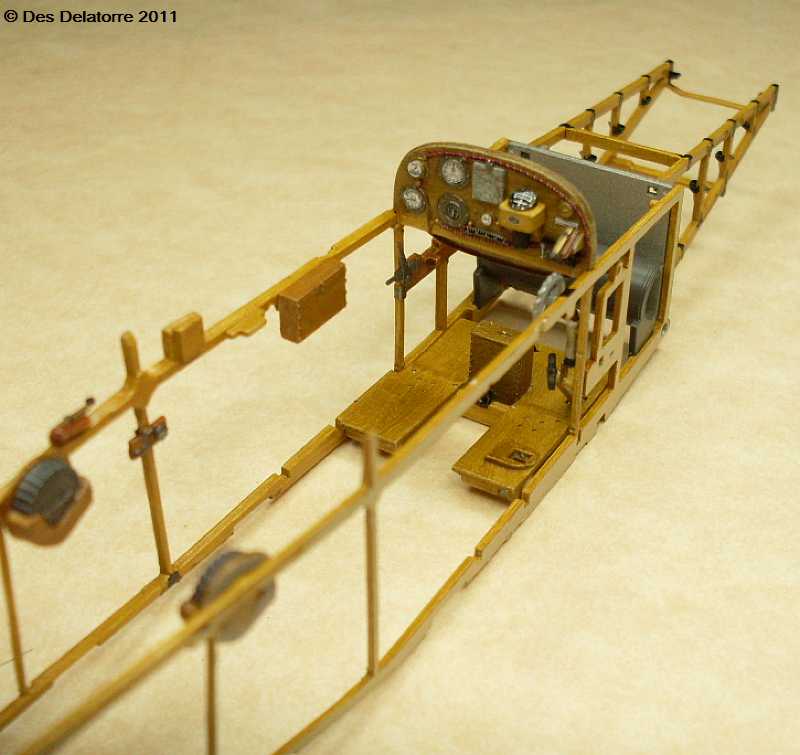
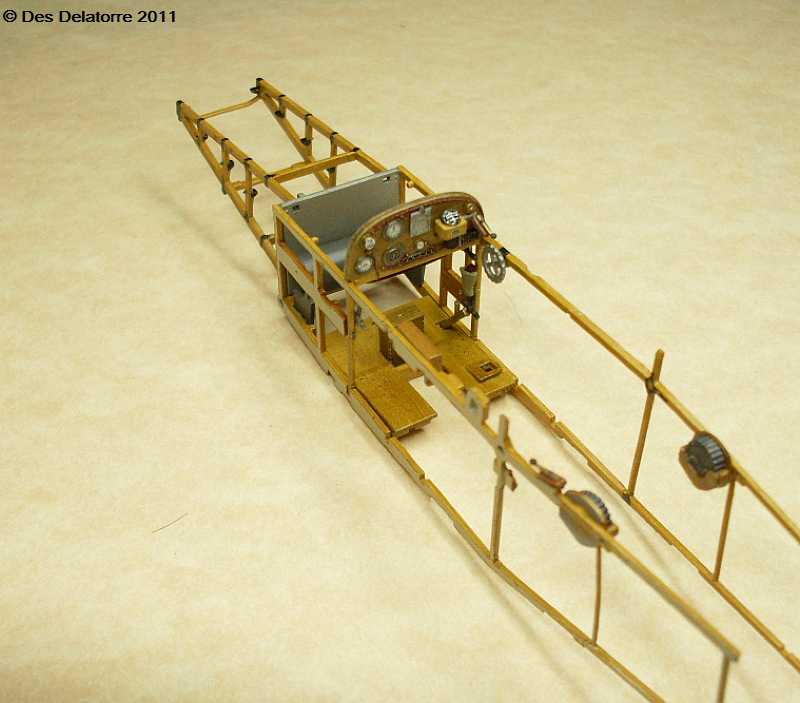
I have started to assemble the fuselage structure, the two sides have been connected to the firewall, the instrument panel along with the cockpit floor are dry fitted for a test fit. The different coloured timbers show up to advantage here, I believe it looks better than having all the wood work the same colour, but that is a choice left entirely up to the individual modeler.
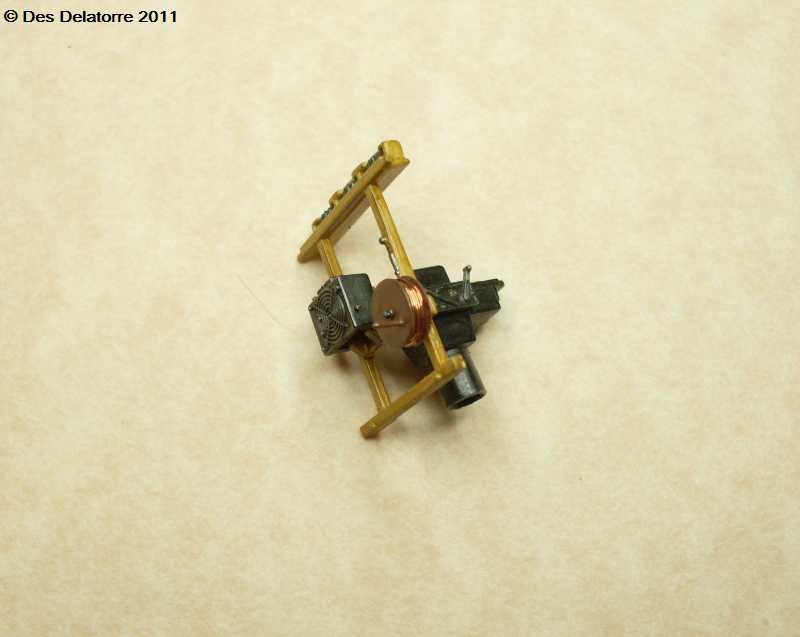
This is the camera and radio equipment. I filed out the aerial spool and replaced it with 0.13mm copper wire. The radio and camera are painted with Mr Metal Color Dark Iron then polished, highlights on the radio are dry brushed with MMC (Mr Metal Color) Stainless. The nut and bolt in the centre of the aerial spool is from the Grandt Line nut set painted with MMC Stainless.

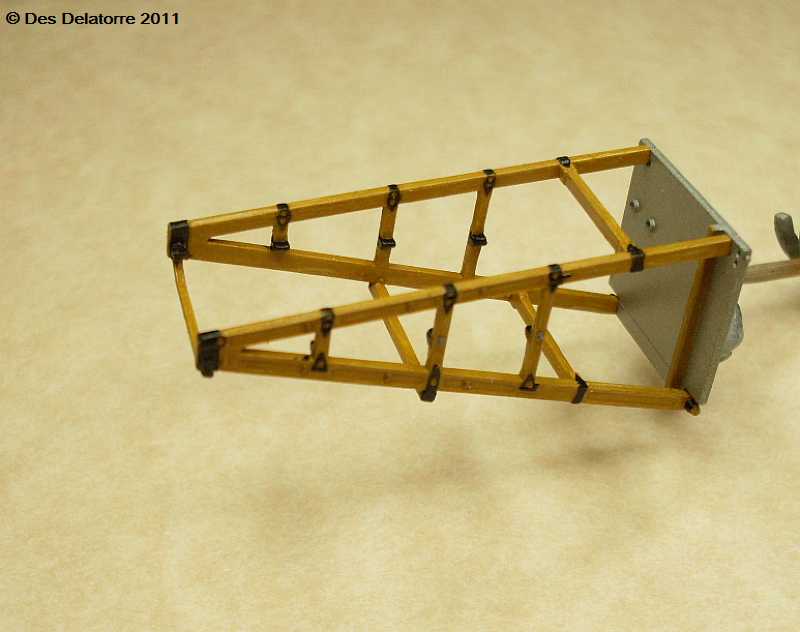
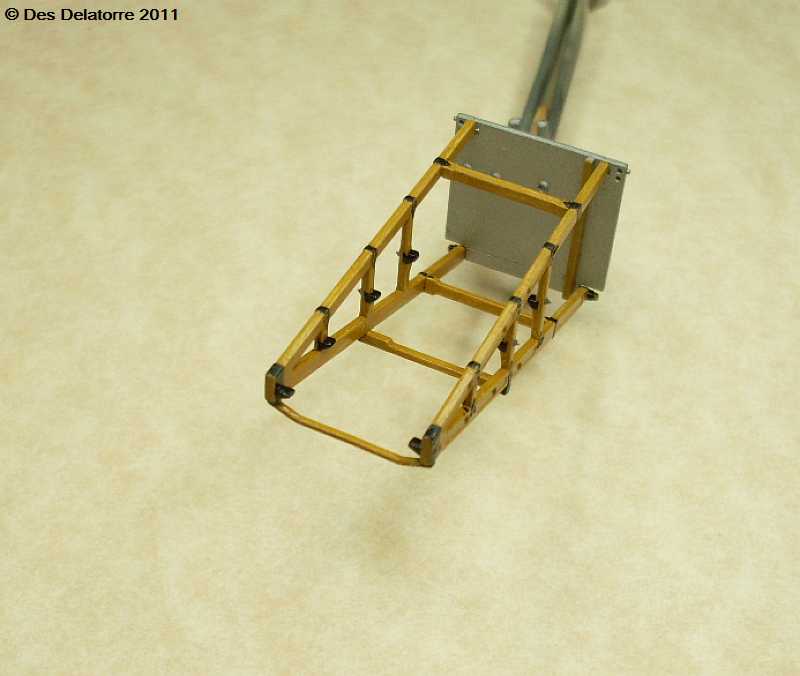
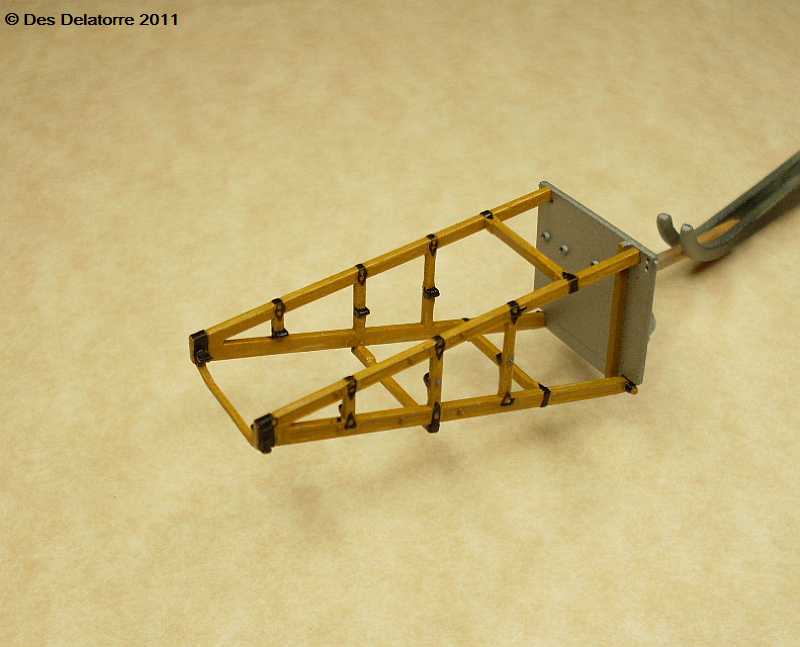
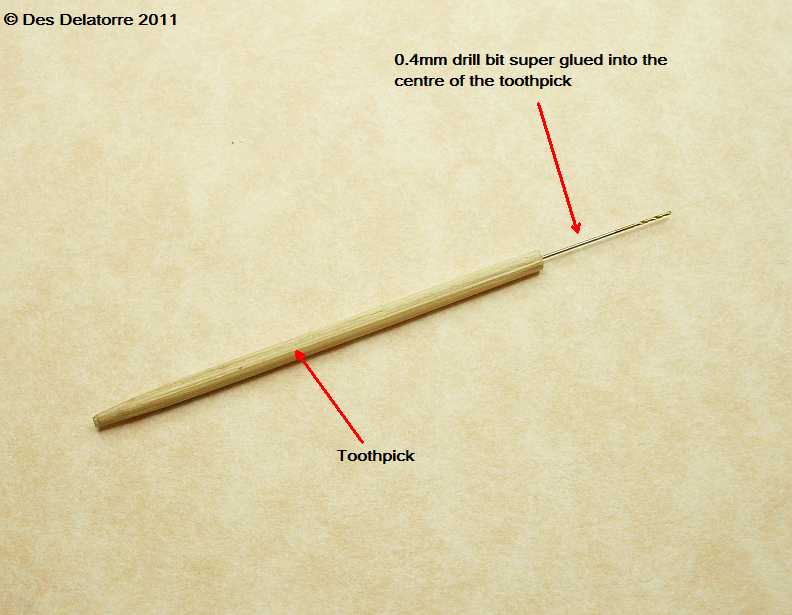
I’m well under way with the fuselage frame rigging. I’m using 0.12mm monofilament and 0.4mm brass tubes drilled out to 0.3mm. The eyelets are made from 0.13mm copper wire and fitted into 0.4mm holes drilled into the frame. The pin vice is too big to drill close to the frame so I super glued a 0.4mm drill bit into the end of a toothpick. Use the drill bit to drill a hole in the centre of the end of a toothpick making sure that it is centred. Insert the shank of the drill bit into the hole and push it down as far as it will go, apply a drop of CA around the drill so it runs into the hole. This allows me to drill in precise locations by simply twisting the toothpick between my fingers, the thin section toothpick is not restricted by the fuselage frame allowing virtually straight holes into the frame.
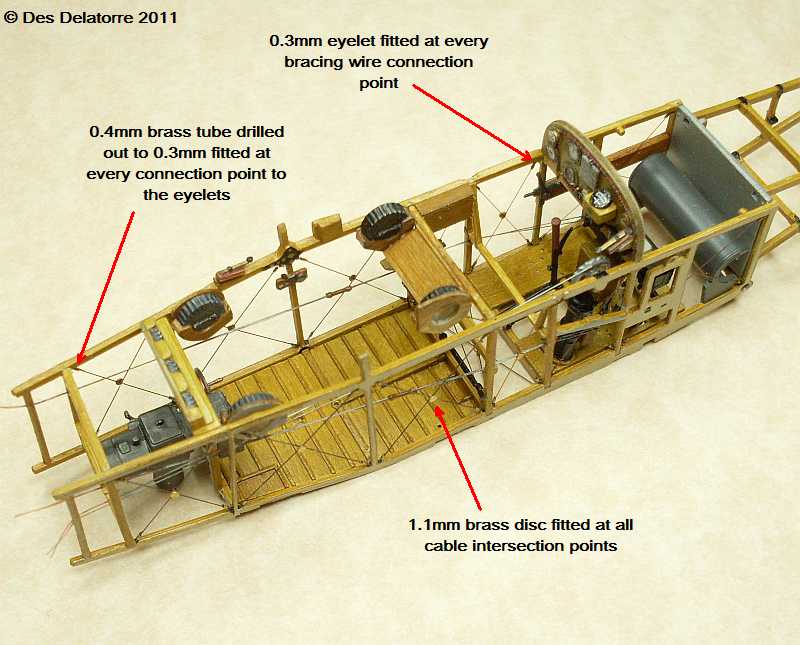

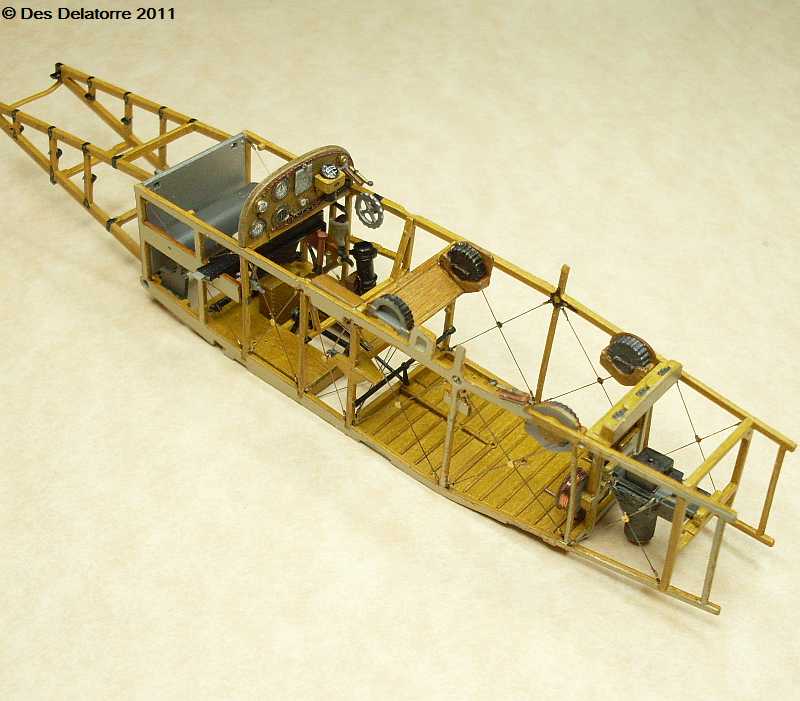
The fuselage frame has now been rigged along with the control rigging, I still need to rig the engine bearers. I fitted eyelets and brass sleeves to every connection, with the engine bearers that is a total of 68 eyelets and 68 brass sleeves, with that many it is quite time consuming, each brass tube had to be drilled out to 0.3mm. CA (super glue) holds the eyelets and the brass sleeves in place, only a very small drop is required.
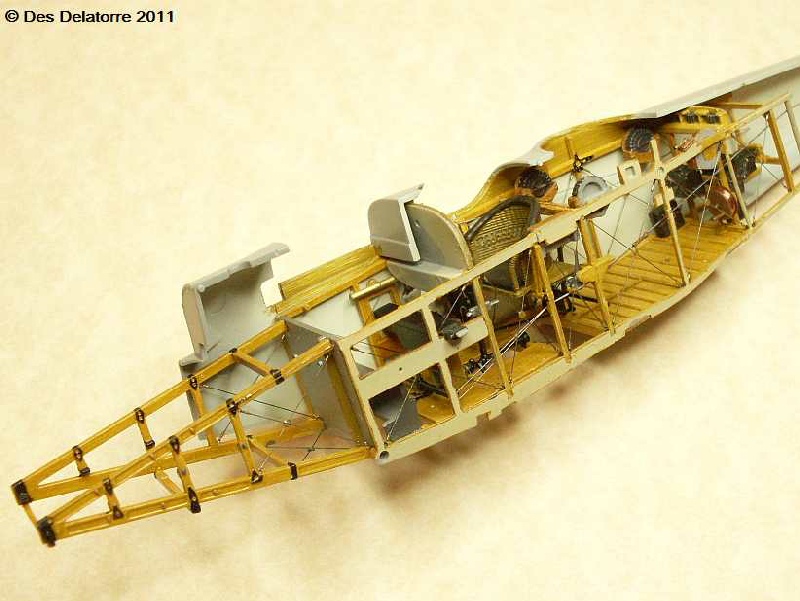

I have completed all the fuselage frame rigging, it was quite an involved process with a lot of eyelets and brass sleeves having to be made, it took me three full days to do the rigging. The instructions for the engine bearer rigging is a little vague, some guess work was required but I think it looks accurate. All the rigging was painted with Mr Metal Color Stainless and the control rigging was painted with Humbrol No.56 aluminium, I left the little brass discs as natural brass
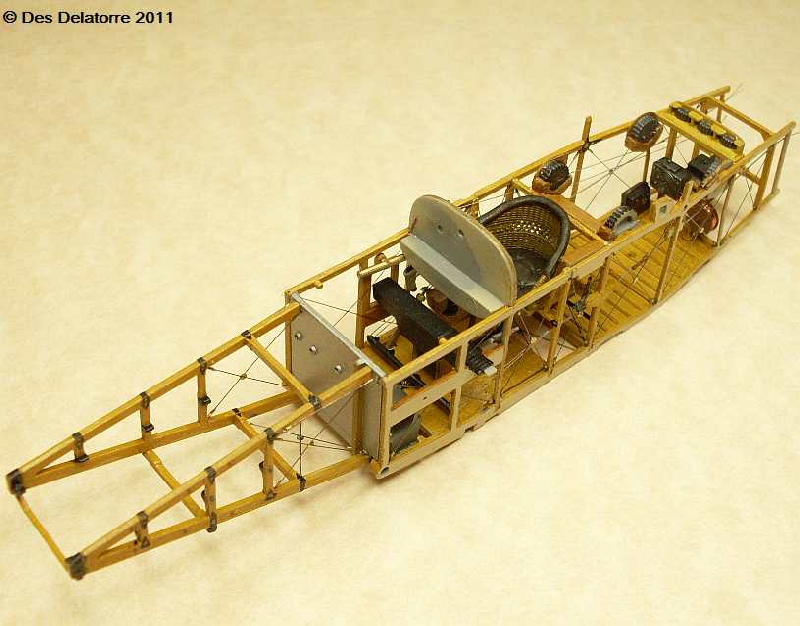
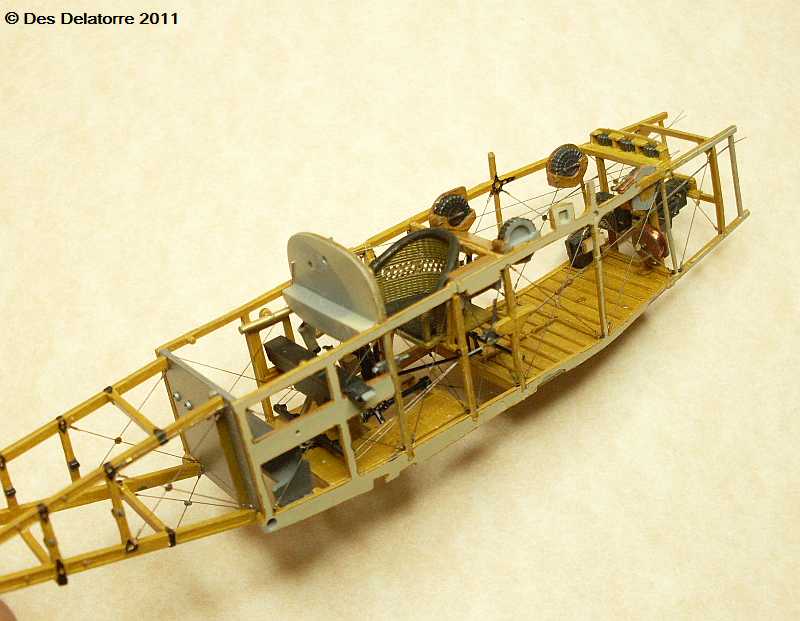
I have painted the inside of the fuselage side with Gunze Off White, the top timber section is done with oil paints over the off white paint. The pilot seat is the original WnW kit supplied seat, I drilled out the cross weave around the back of the seat with a 0.4mm drill bit, then I filed out the holes using a broaching set, I just pushed the broach tool, which is a square section, into the hole increasing the size of the broaching tool after each pass until I reached the size I liked, not perfect but it looks pretty good. The cane was painted with Gunze middlestone and then washed with very thin raw umber oil paint, the seat still requires a coat of clear. As you can see by the last two photos, most of the rigging and the details will be hidden by the fuselage once it is closed up, it’s a shame but I still feel it well worth doing all this extra work. I have added the gunners control column but I still need to add his seat, the battery box has been painted and fitted.
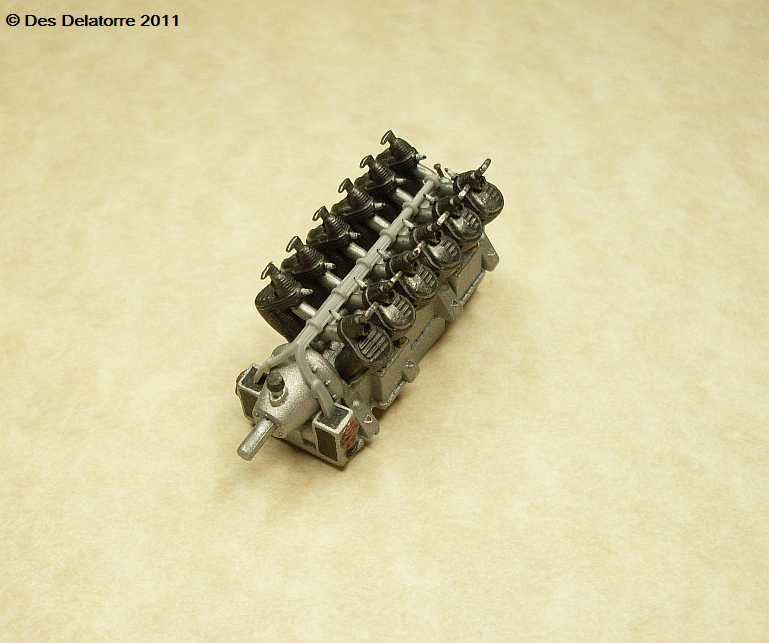
Work on the engine has commenced, I am not going to super detail this engine as I will be adding all the engine covers on this build. The crankcase was sprayed with Humbrol Aluminium 27001 then lightly buffed. The cylinders are sprayed with Mr Metal Color Dark Iron and again lightly buffed, the other painted parts on top of the cylinders are done with Mr Metal Color Stainless. So far the engine has gone together very easily, all parts fit extremely well.

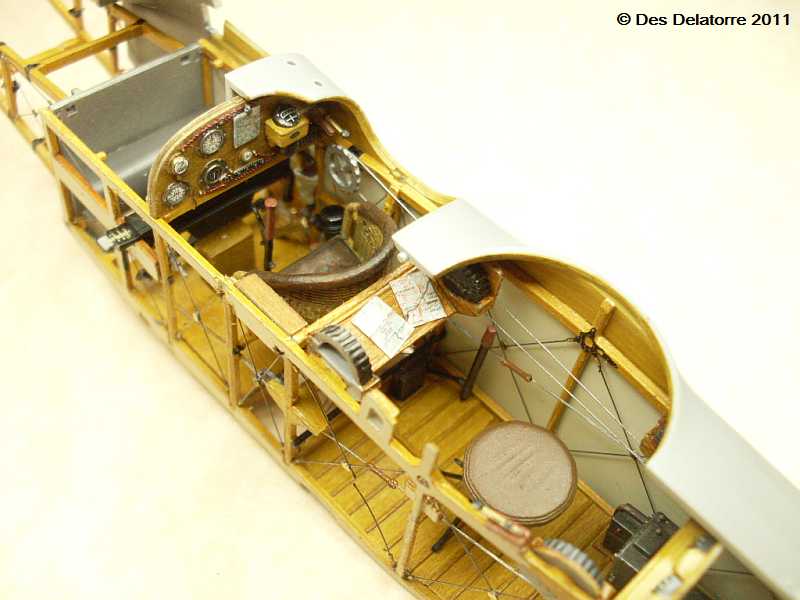
The fuselage frame is now attached to the right side fuselage, the frame fitted very well. The engine is sitting in the frame for trial fitment. The photo on the right shows two maps I put on the gunners map table, also the gunners stool is fitted as well as the pilot’s seat, everything fits beautifully. I added spark plug leads to the plugs, I also hollowed out the rocker arms to make them more defined.

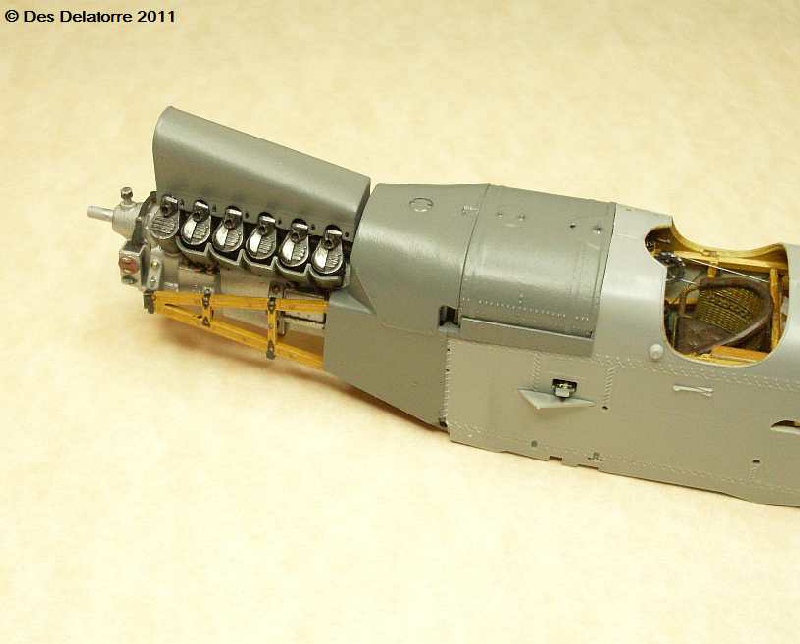
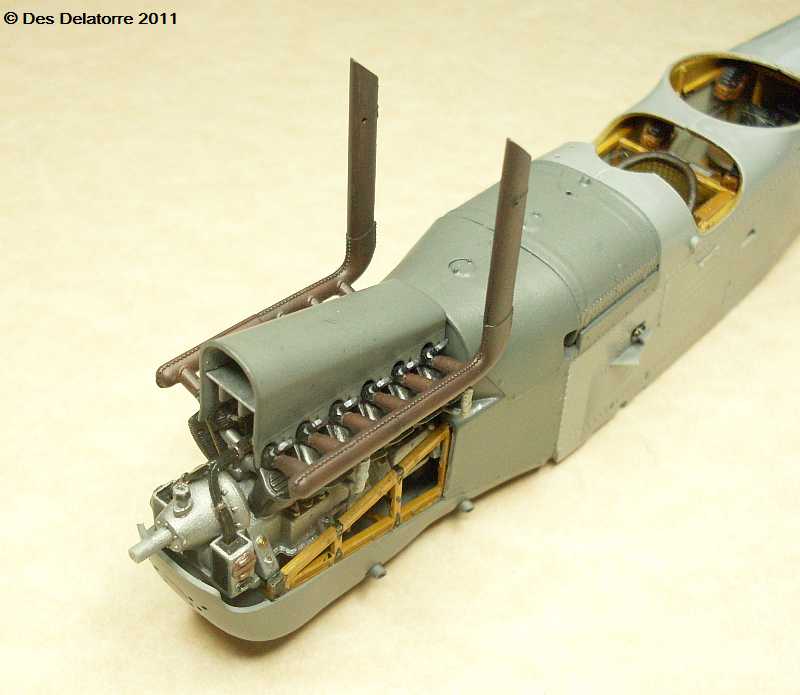
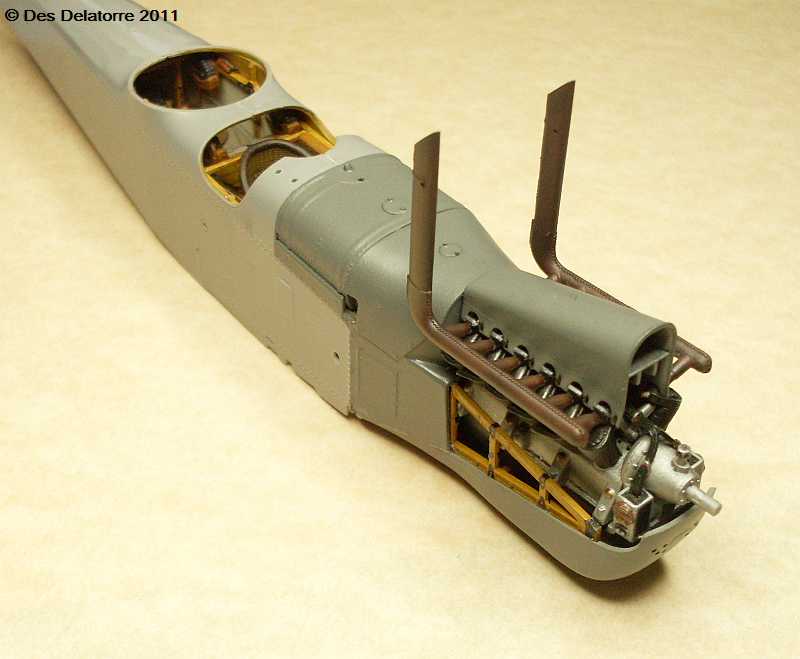
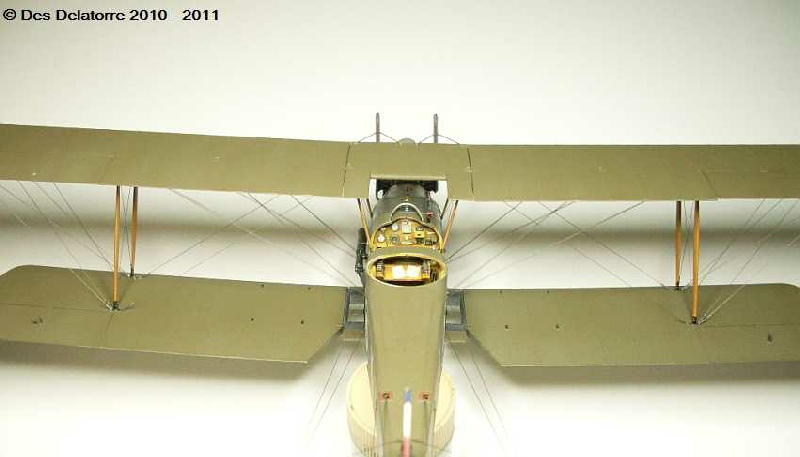
I have painted the front section using the WnW suggested colour, Humbrol Battleship Grey No.106, once it was dry I sprayed it with Humbrol Satin Cote. I still need to paint the filler caps with a brass paint. The inside of the engine top cowl will be aluminium, unfortunately it covers all the spark plugs and spark plug leads that I fitted, I will be fitting push rods as well. Make sure the fuel tank is fitted before the fuselage sides are fitted to the frame.
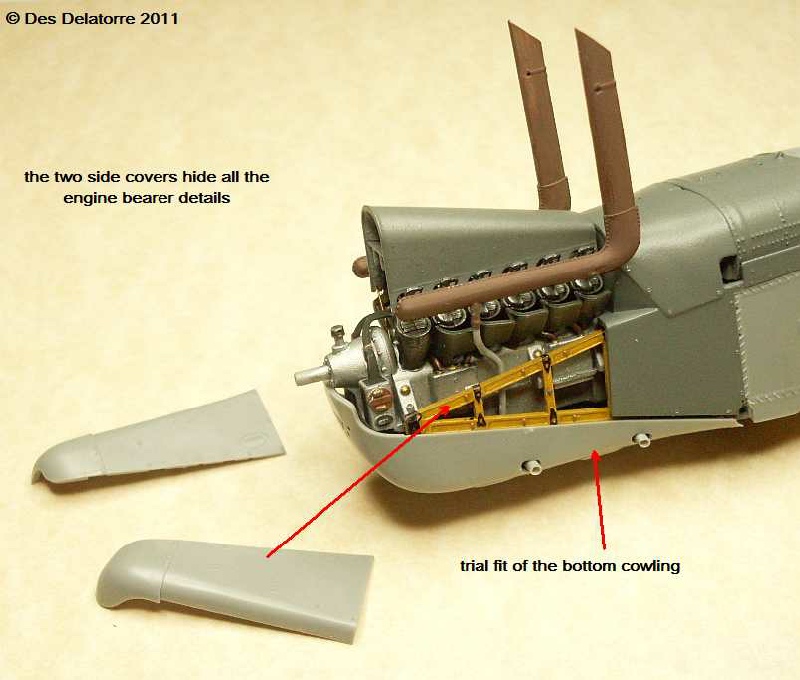

Exhaust stacks are fitted and painted with Humbrol No.70 Brick Red, they still need to be weathered. Bottom engine cowl is dry fitted, the side covers will cover all the detail on the engine bearers, I’m still contemplating leaving them off. The front photo shows that the spark plugs, the plug leads and some of the push rods are still visible under the top cover, so all that extra work was not wasted.
The bottom engine cowl is now fitted, it was a very tight fit to line up with the fuselage sides. The engine is also fitted, it sits very well on the engine mounts and slipped into position with no hassles. I have added graphite to the exhaust stacks and sprayed them with a flat clear, more graphite is needed.
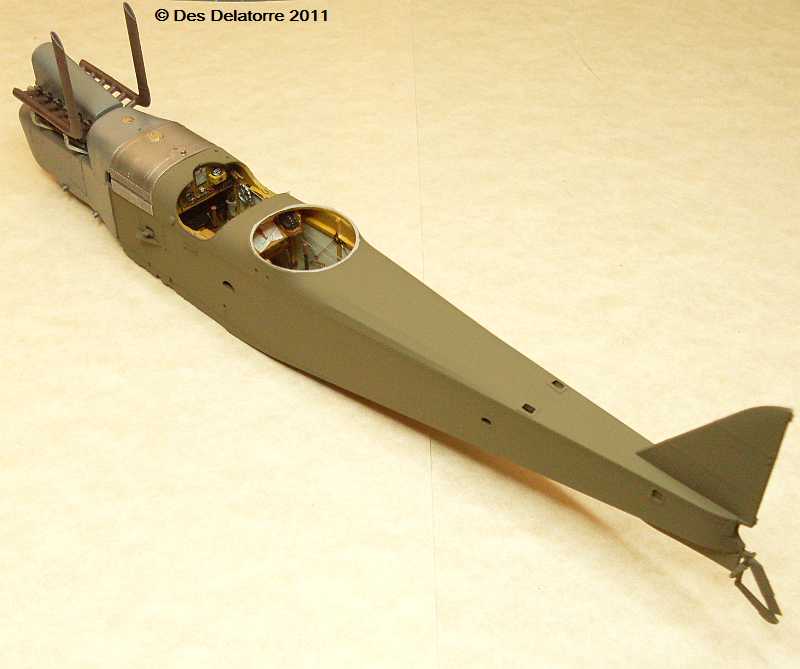
There is no specific colour for PC10, it varies between olive drab and chocolate brown and any colour in between, so what you apply to your model will be correct to some degree. I have sprayed the fuselage with my own mix of colours, it will darken when the clear is applied. The small PE control cable exit surrounds have been fitted using CA, I also thinned them with a light sanding.
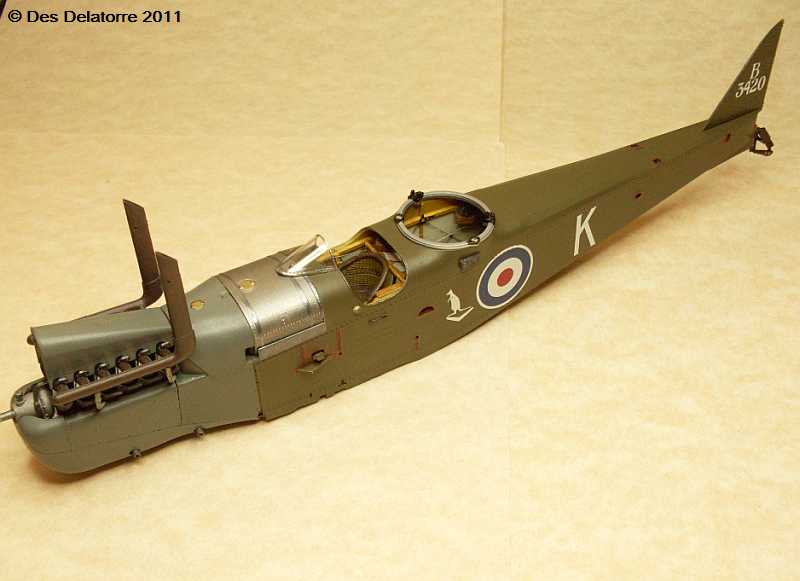
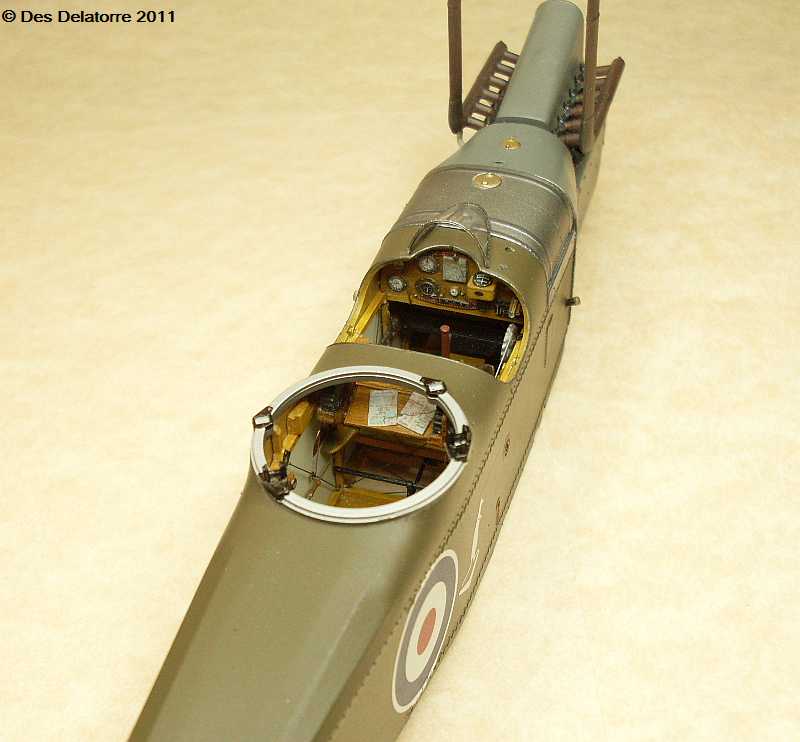
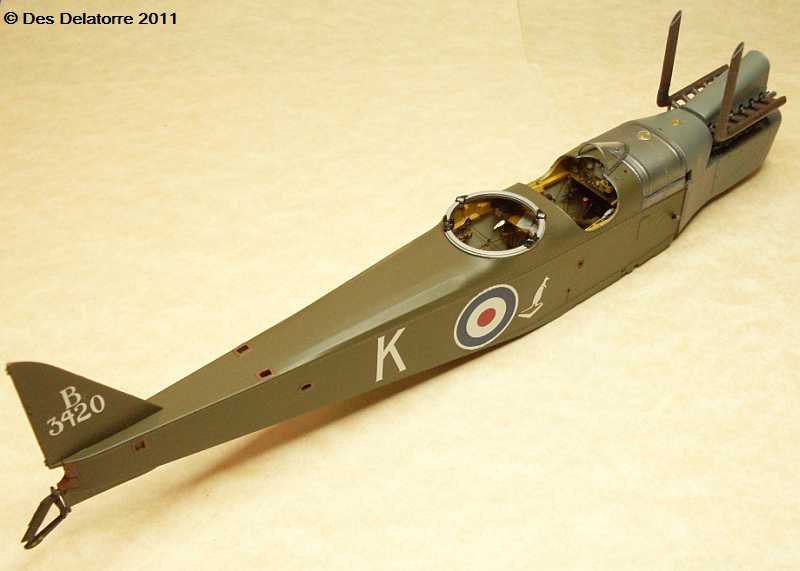
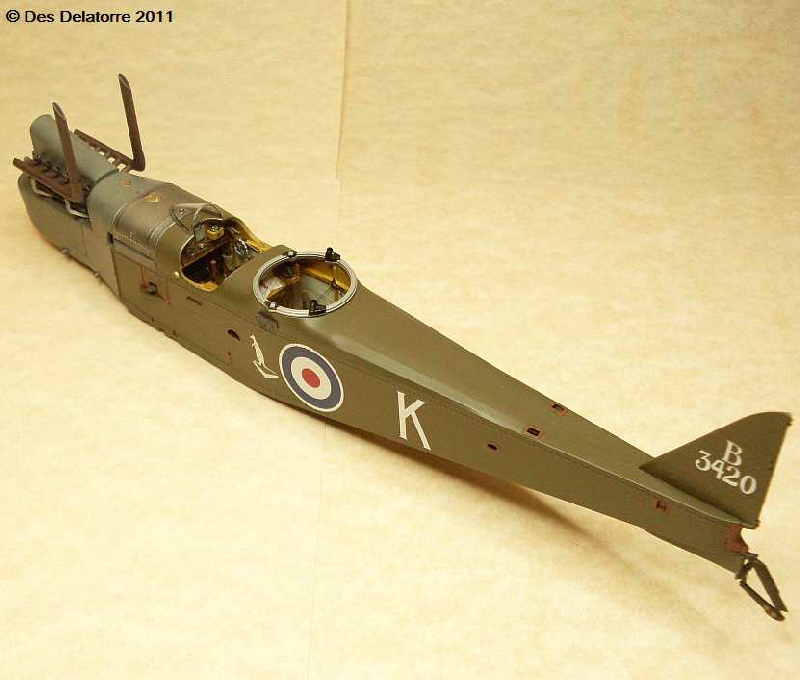
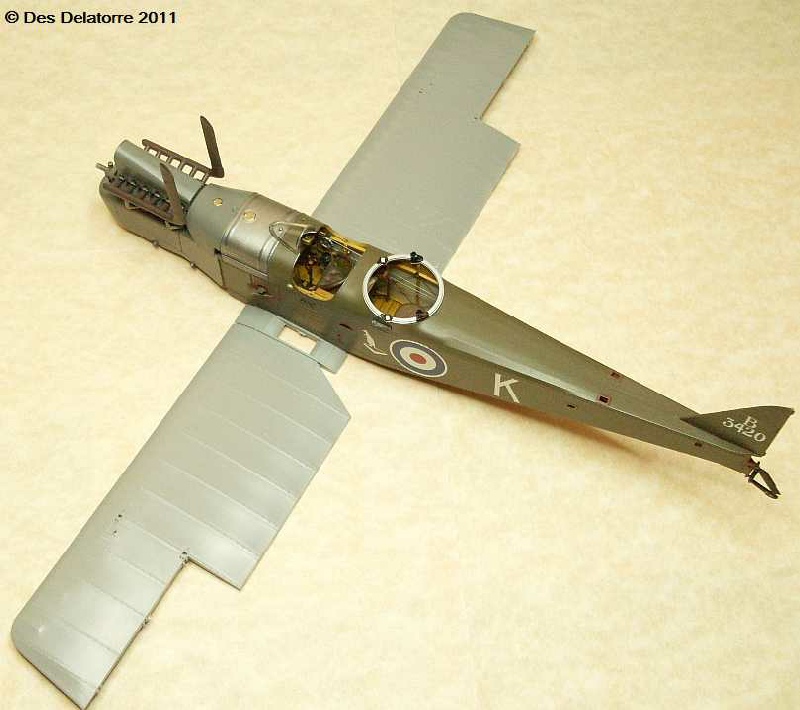
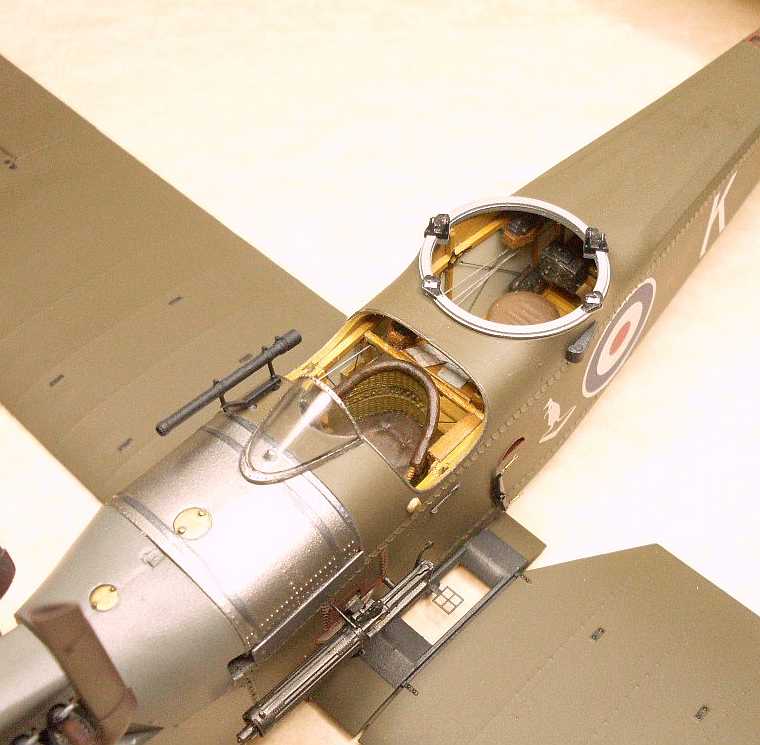
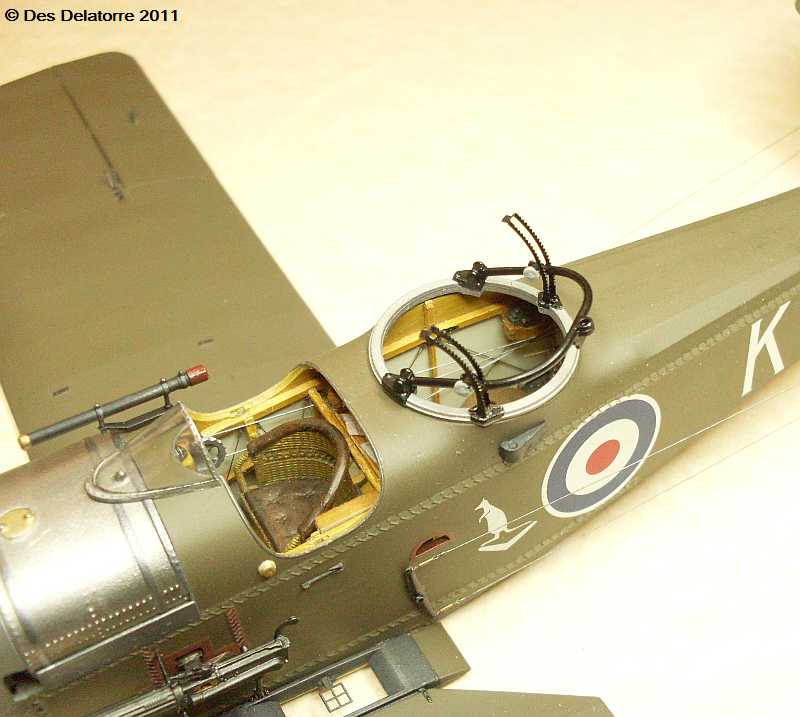
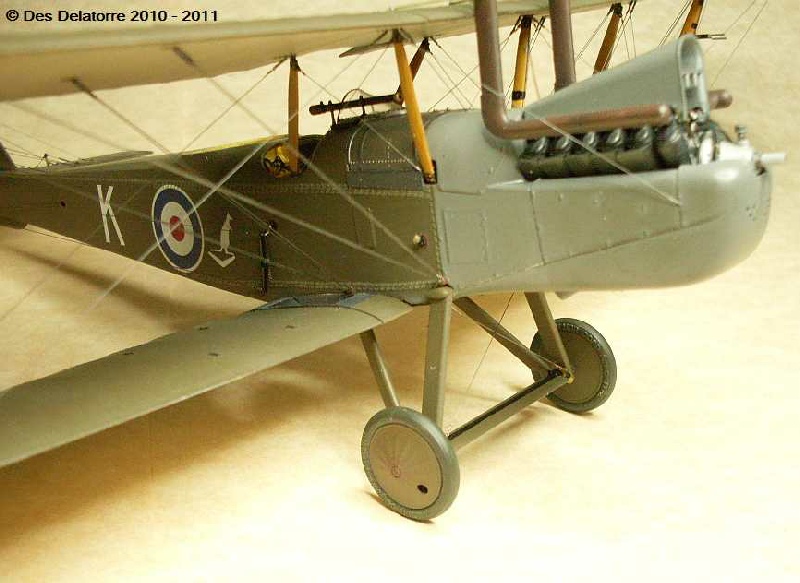
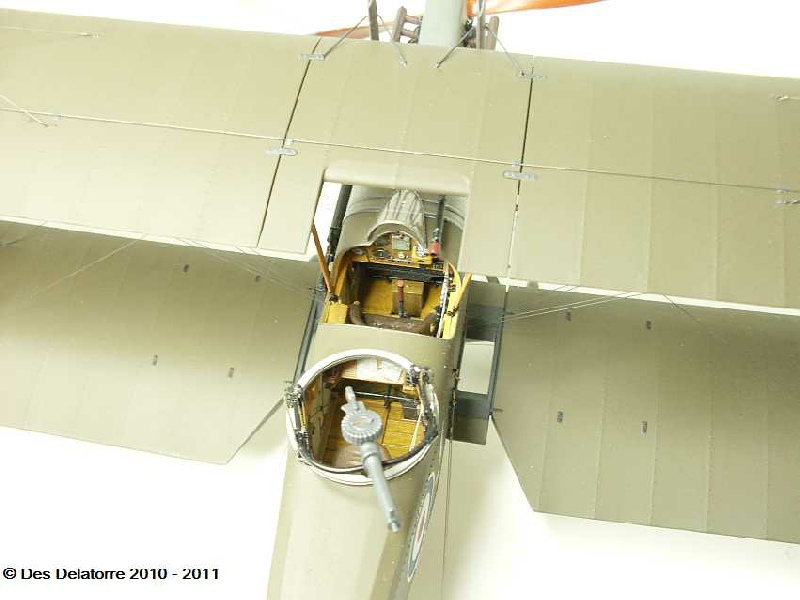
The decals are of the usual Wingnuts top quality, they adhere extremely well to a smooth gloss surface and conform to the stitching with no problems, I used Mr. Mark Softer under the decals, once they were dry I sprayed Humbrol Satin Cote to protect the decals. The cockpit photo shows the extra maps I placed for the observer on his map table, the gun ring was painted using Humbrol 27001 Aluminium. The leather reinforcing pieces around the control cable exit holes are painted with Humbrol No.133 Satin Brown. The lower wing is fitted just for a trial, it fits very well, I just need to scrape a little paint from under the fuselage so it sits fully home. The windscreen has had the frame painted with Humbrol Aluminium, the windscreen itself is super clear. Once all the bits and pieces have had their final coat of paint the fuselage (PC10 part) will be sprayed with Humbrol Matt Cote.
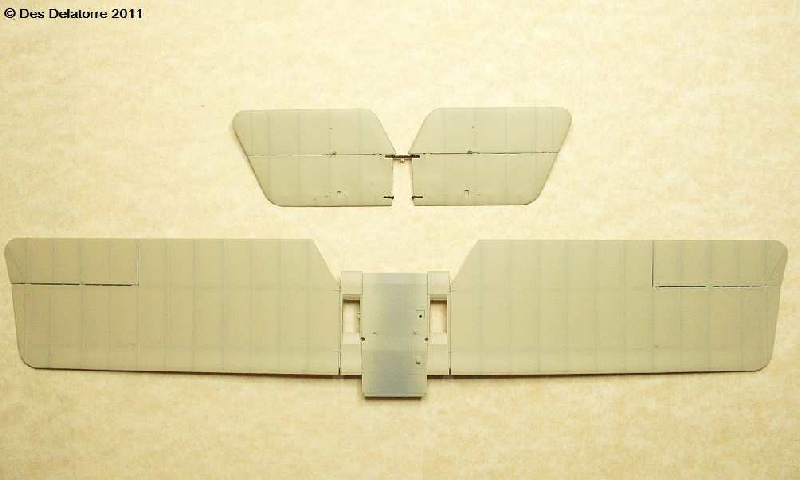
The bottom wing and tail plane pre-
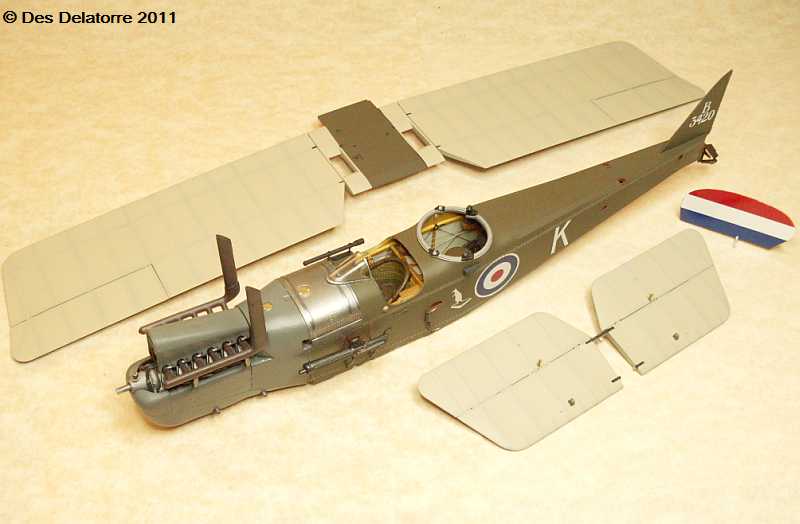
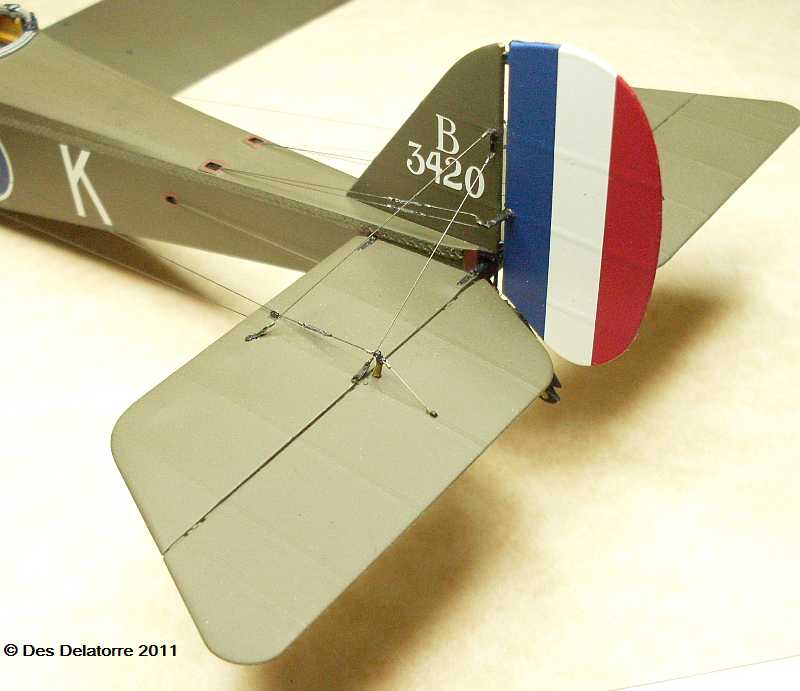
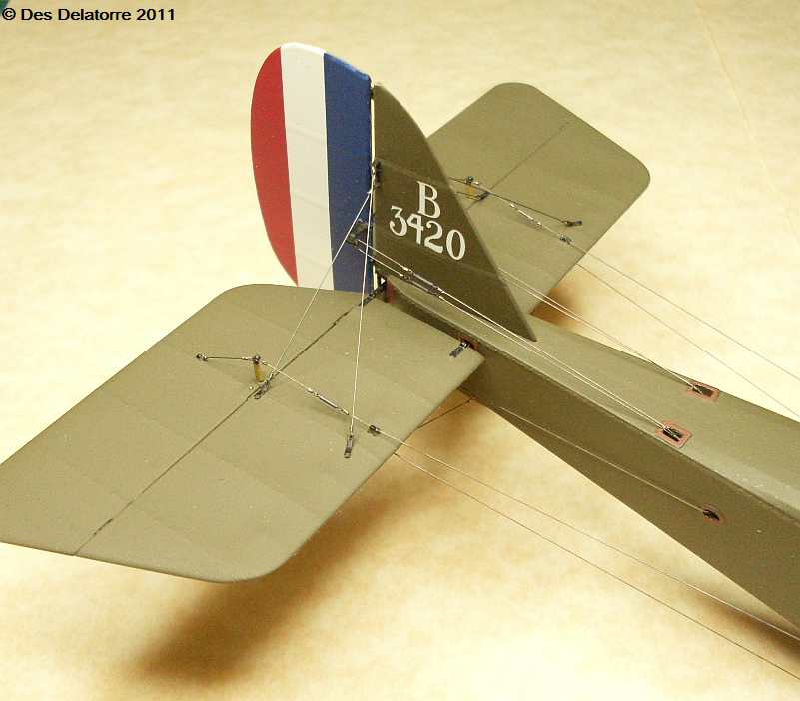
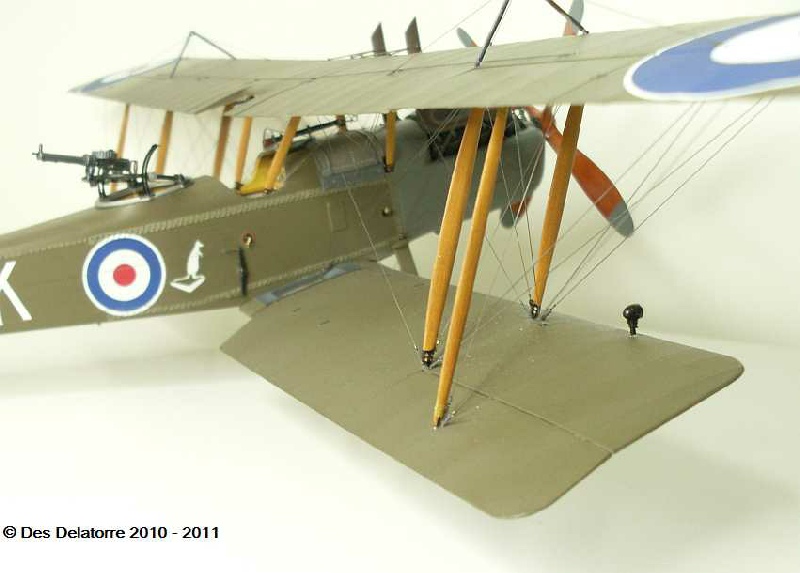
Decals have been applied to the rudder after it was painted with full gloss white enamel, it will be sprayed with Humbrol Matt Cote to match the fuselage. The machine gun is fitted, it was painted with Mr Metal Color Dark Iron then polished with a soft brush. CDL has been sprayed with Humbrol Matt Cote. Stitching around the fuselage has been highlighted with a lighter shade of PC10 then each stitch painted with a darker green. Elevator control horns are fitted and painted, I attached the four turnbuckles to the two control horns before they were glued to the fuselage, they sit very close to the fuselage so fitting the turnbuckles would prove difficult once the horns are on the aircraft.
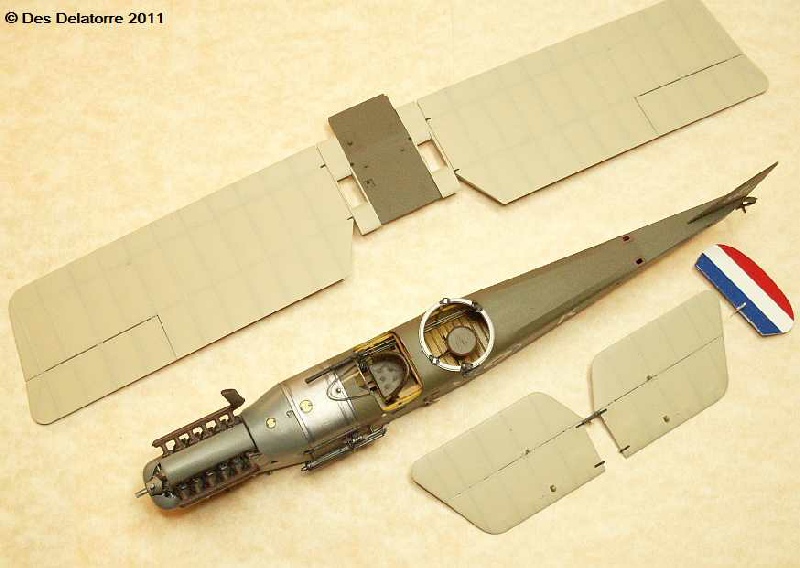
The bottom wing is now fitted, it is a very tight fit so all paint has to be removed
from the mating surfaces. The rudder is also fitted, I used the kit decals and sprayed
them with Humbrol Matt Cote. There is a good sized gap between the rudder and fin
so the only place to apply glue is the two tiny hinges, this makes for a pretty weak
assembly so take care when handling the model. The horizontal stabilizer fitted very
well, make sure it is horizontal before gluing. The close-
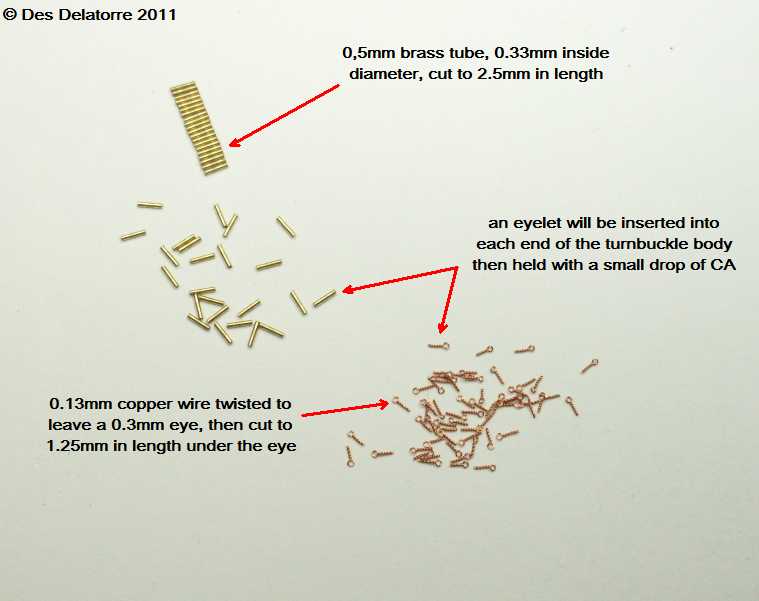
I have cut the 0.5mm brass tube to lengths of 2.5mm, into each end of these tubes I will insert and eyelet and hold them in place with a small drop of CA. The eyelets are made from 0.13mm copper wire twisted to form a 0.3mm eye, the tail is cut to a length of 1.25mm (below the eye). These turnbuckles will be used on the control cable rigging.
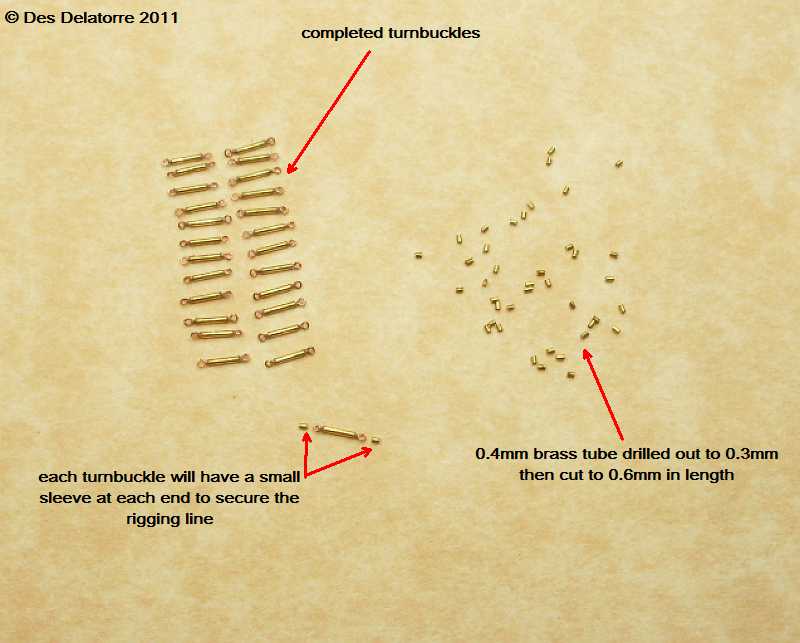
I have made 25 turnbuckles which will be used throughout the rigging process. The small brass sleeves which retain the rigging line once it has looped through the turnbuckle eyelet are made from 0.4mm brass tube drilled out to 0.3mm and then cut to a length of 0.6mm.
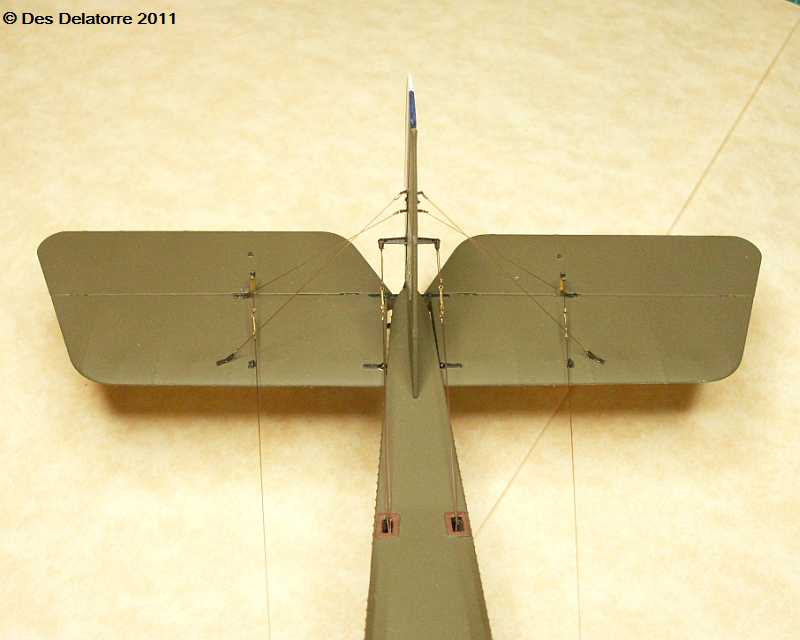
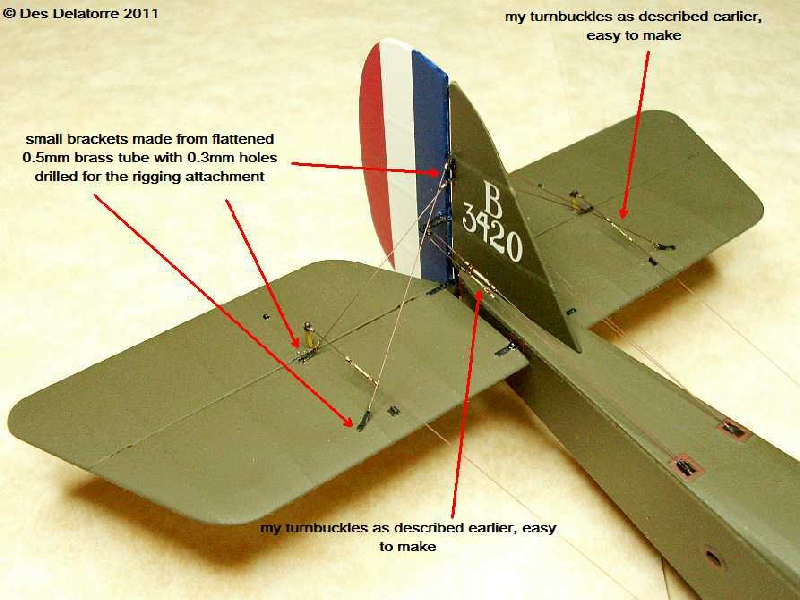
I have started the tail end rigging. I made small brackets from flattened 0.5mm brass tube and fitted them to the tail plane and fin, I then connected the rigging to the brackets. The rudder control cables are twin cables so I fitted four turnbuckles, the elevator cables also had turnbuckles fitted. I have use 0.12mm monofilament for the rigging and it is all held in place with small drops of CA. I still need to do the rigging under the tail plane, also the rigging for the tail skid (steering). It is time consuming work making then fitting turnbuckles but in the long run it is worth the effort.
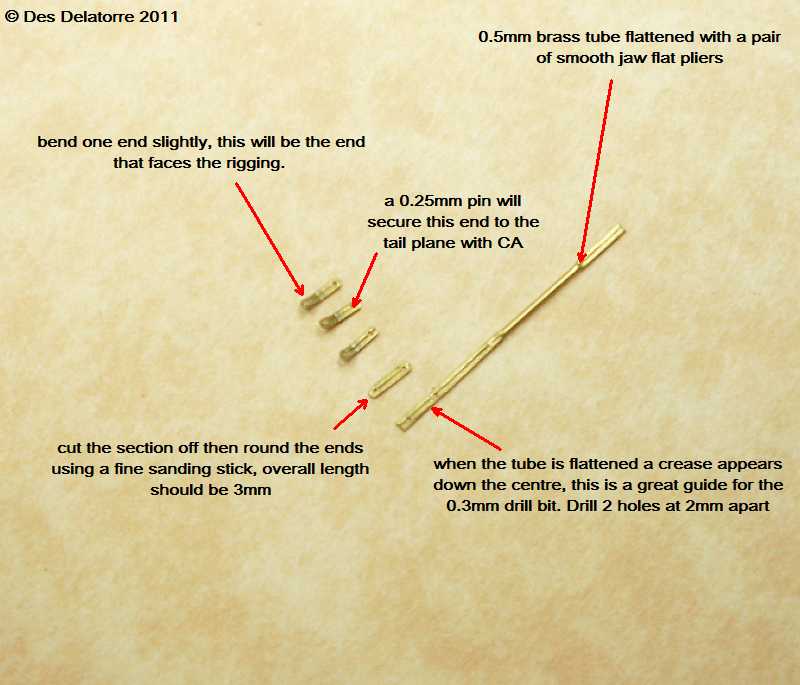
Making the tail plane rigging brackets.
I used 0.5mm brass tube, flatten it between the jaws of a smooth jaw pliers, you will notice a crease line will appear down the centre of the flat section, this is a great guide for the drill bit. Drill a 0.3mm hole then at 2.0mm drill another 0.3mm hole. Cut the section from the brass tube and holding it in the pliers round each end using a fine grade sanding stick. Measure the mid point then again in the smooth jaw pliers hold the bracket on the mark then bend it slightly. Drill a 0.3mm hole in the tail plane where the bracket will mount, place the bracket over the hole with the bent section pointing in the direction of the rigging. Insert a 0.25mm pin through the bracket and through the tail plane, have about 5.0mm of the pin protruding past the tail plane. Add a small drop of CA to the bracket adjacent to the pin and also another small drop from below where the pin protrudes past the tail plane. Once dry, place another bracket over the pin protruding from below, push it down until it is resting on the tail plane with the bent section pointing in the direction of the rigging, add a small drop of CA as above. Snip off the pin on both brackets leaving just enough to simulate the mounting bolt, paint the brackets semi gloss black. If the brackets need a more severe bend they need to be annealed fist simply by running them over a lit match then allowed to air cool, this will reduce the risk of the bracket breaking when bending.
—-
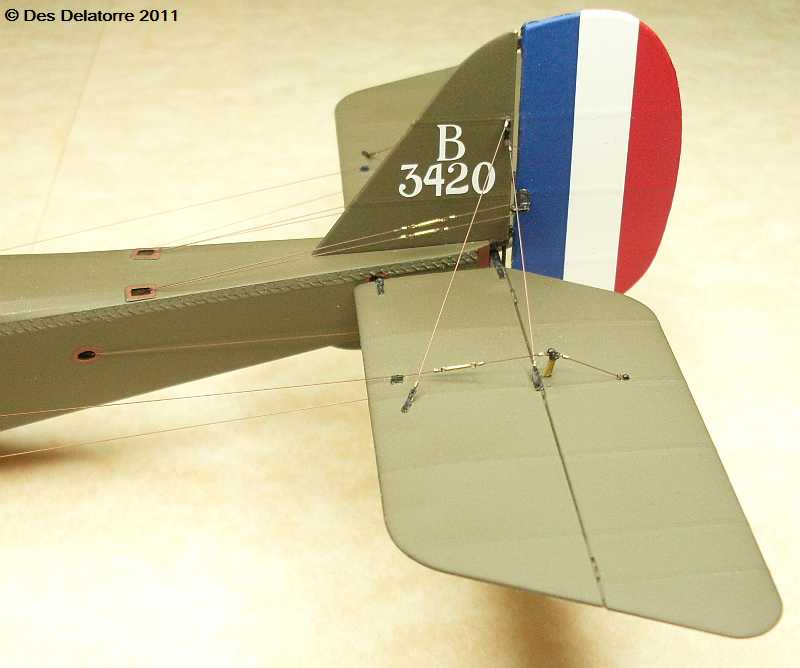
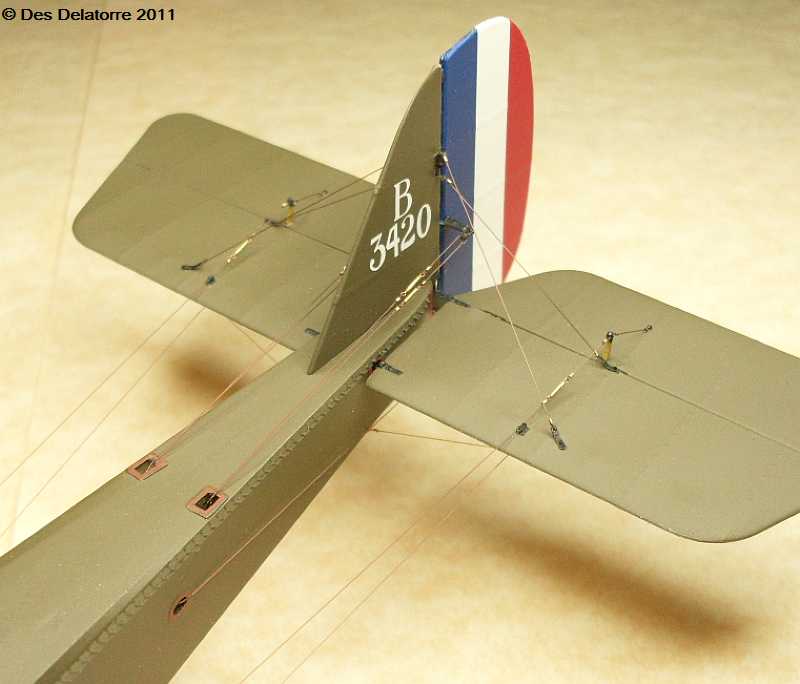
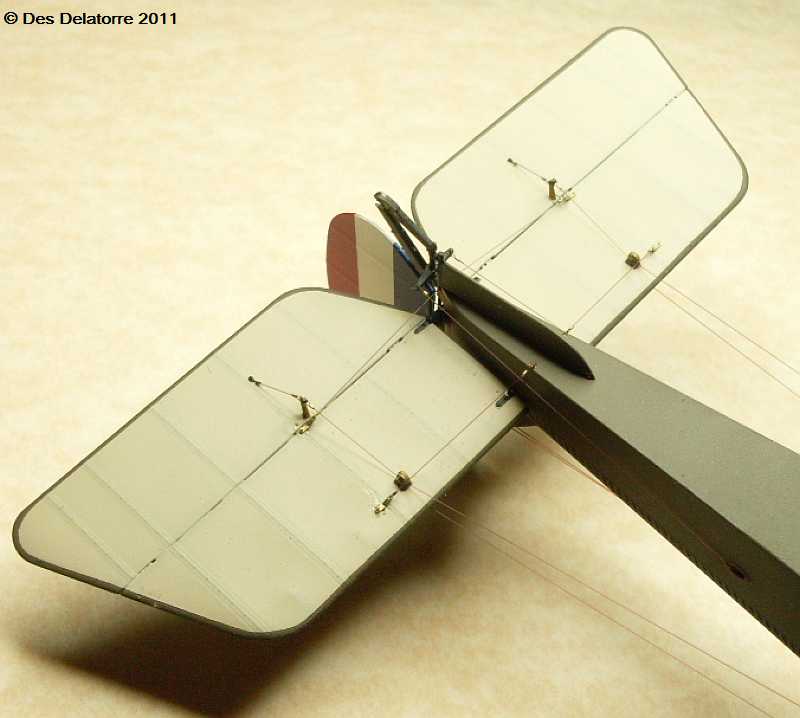
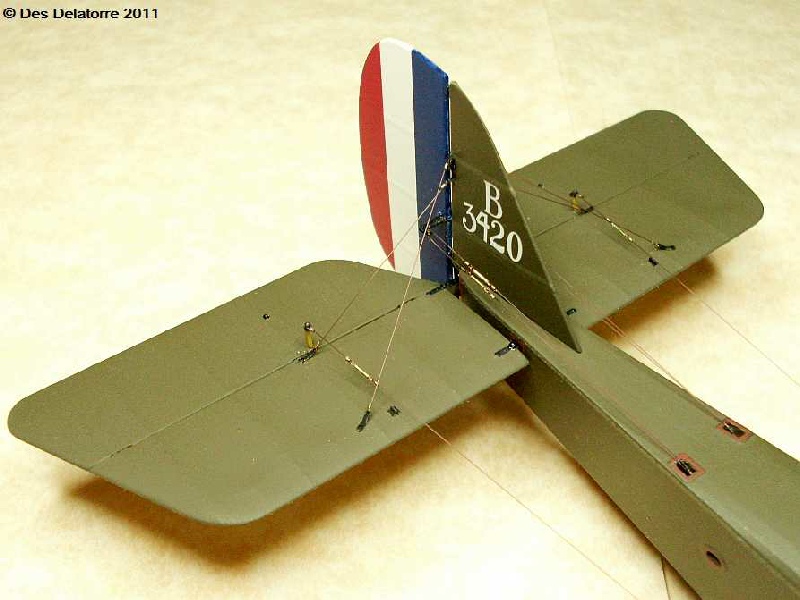
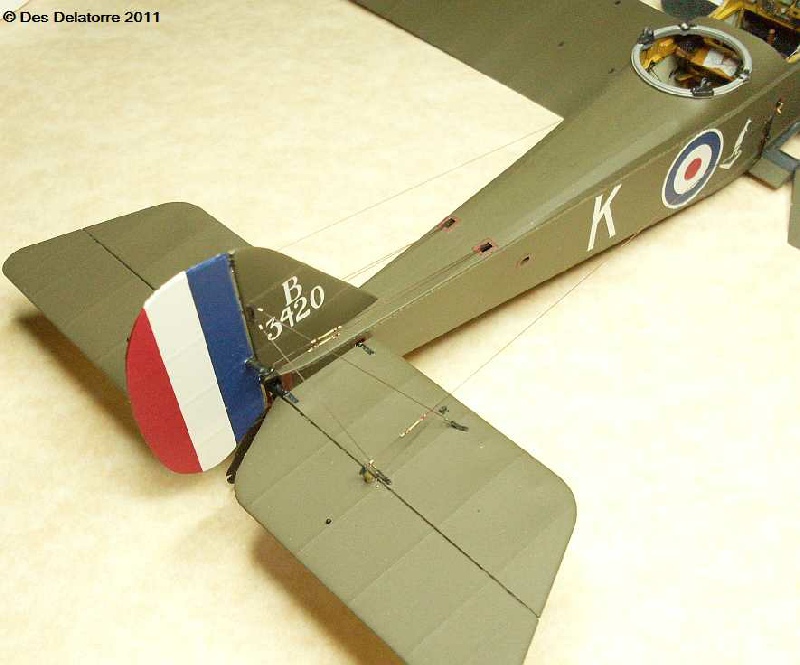
The tail plane rigging is now near completed. The turnbuckles add an extra bit of detail as do the small brass sleeves, well worth the effort to fit them. Notice the elevator cables run under the pulley on the underside of the tail plane and through the tube on top of the tail plane, this is an important feature.
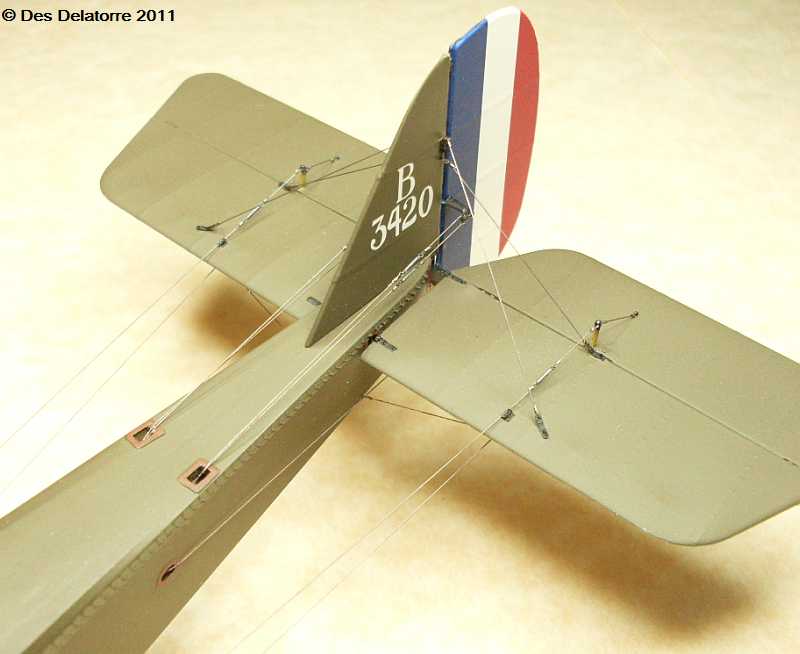
I painted the control cables and rigging wires with Mr Metal Color 213 Stainless and the turnbuckles are painted with Mr Metal Color 212 Iron, both have been lightly buffed using a small soft brush, the small brass sleeves are painted with the Stainless paint, the tail is now completed.

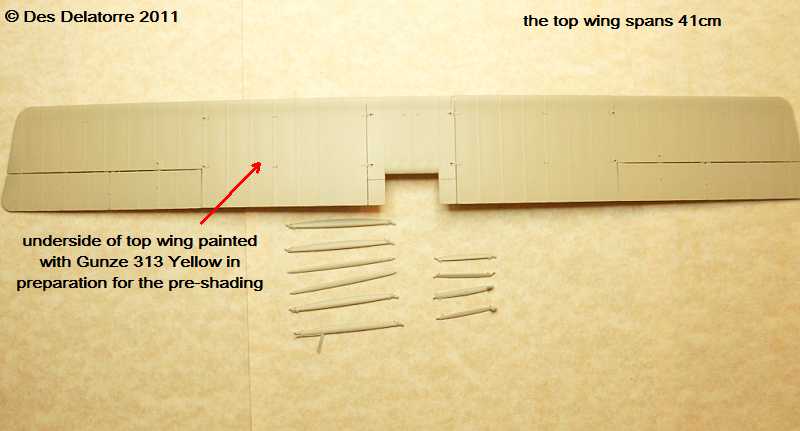
The struts have been base coated with Gunze Yellow, I thinned the paint with a small amount of lacquer thinners, this allows the paint to spray beautifully and also bites into the plastic just a little giving good adhesion. The bottom of the top wing has been done using the same paint. Don’t forget to drill out the brackets to take the strut rigging, I used a 0.3mm drill bit but be careful not to drill too close to the edge, there is not a lot of material there so caution is advised. The wood grain will be done using oil paints with added drying agent.
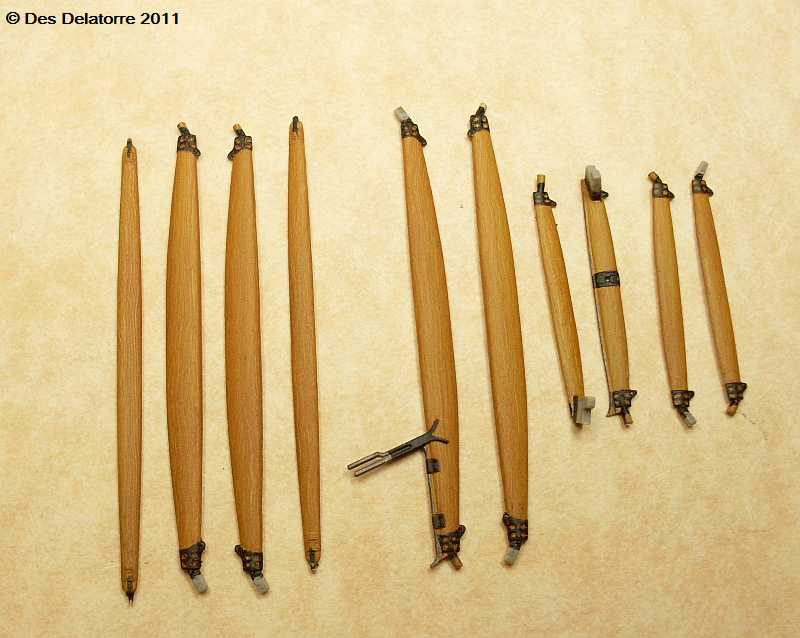
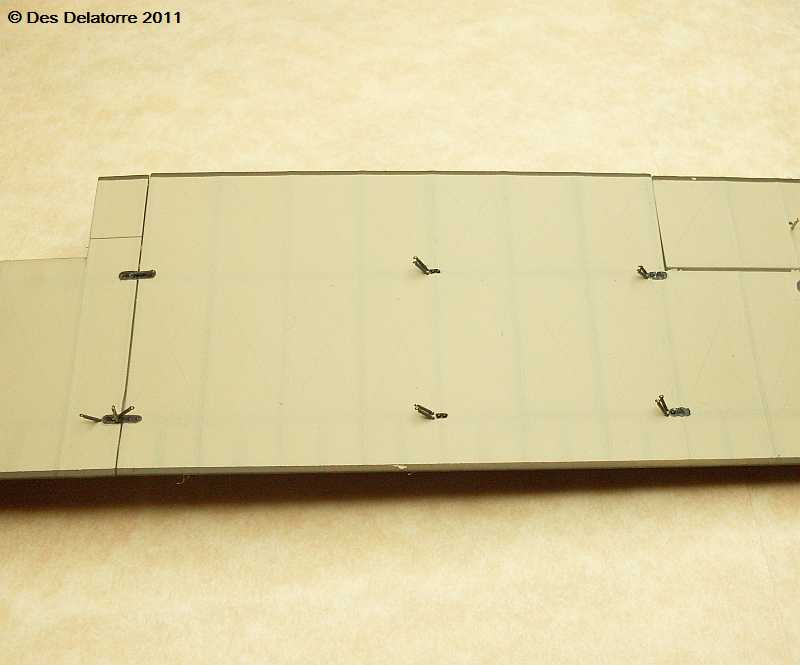
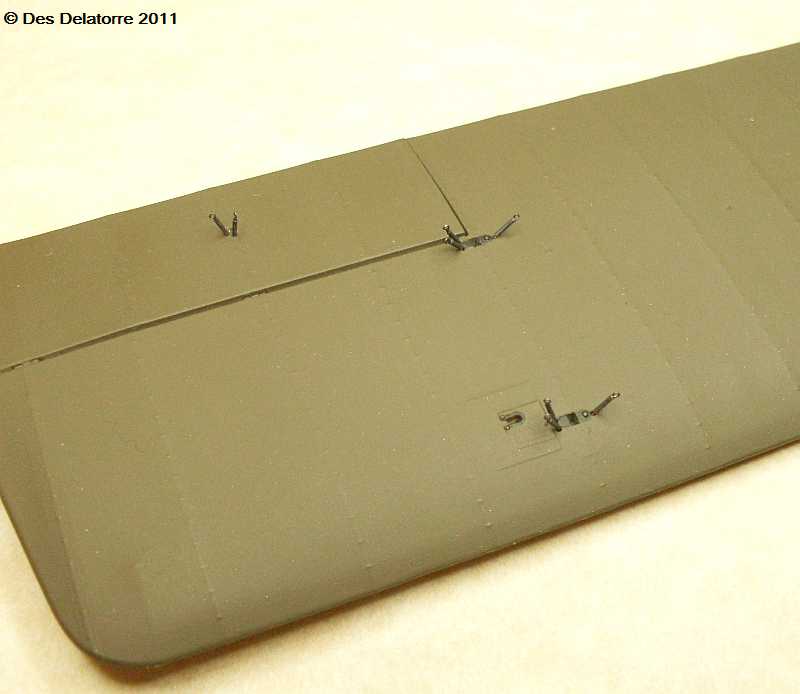

The above photos show some more progress. The struts have been painted with oil paints to simulate wood, the brackets are painted using black printer ink and once all dry they were sprayed with Humbrol Matt Cote clear. I have fitted all the turnbuckles to the underside of the top wing and to the top of the bottom wing in readiness for the rigging. These are one ended turnbuckles with the end without the eyelet fitting directly into the wing and held with CA, they will be bent to the appropriate angles once rigging commences. The observers gun mount is nearly completed, the gun has been painted with Mr Metal Color Dark Iron, the timber hand grips still need to be painted. I have also painted the top of the top wing and clear coated with Humbrol Matt Cote.
The last two photos show the struts fitted, a trial fit of the top wing made sure all the struts lined up with the locating holes in the top wing. I will leave this overnight to allow the glue to dry thoroughly before fitting the top wing.
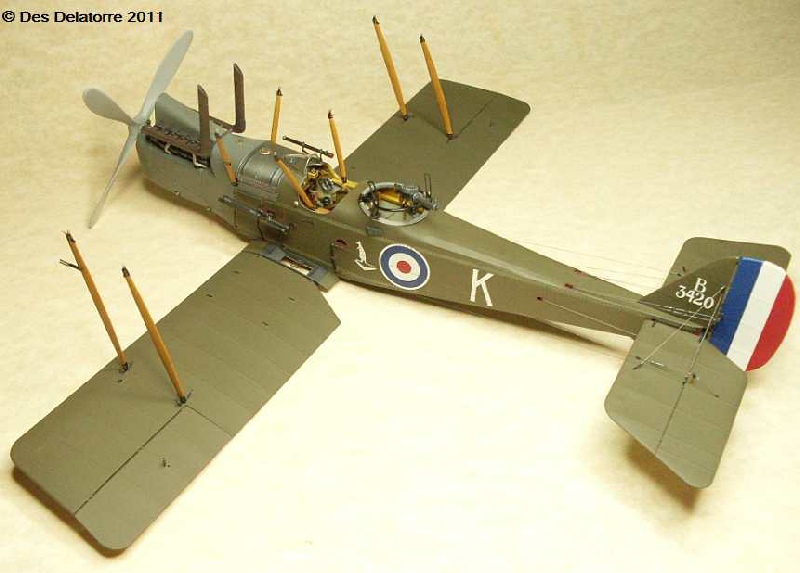

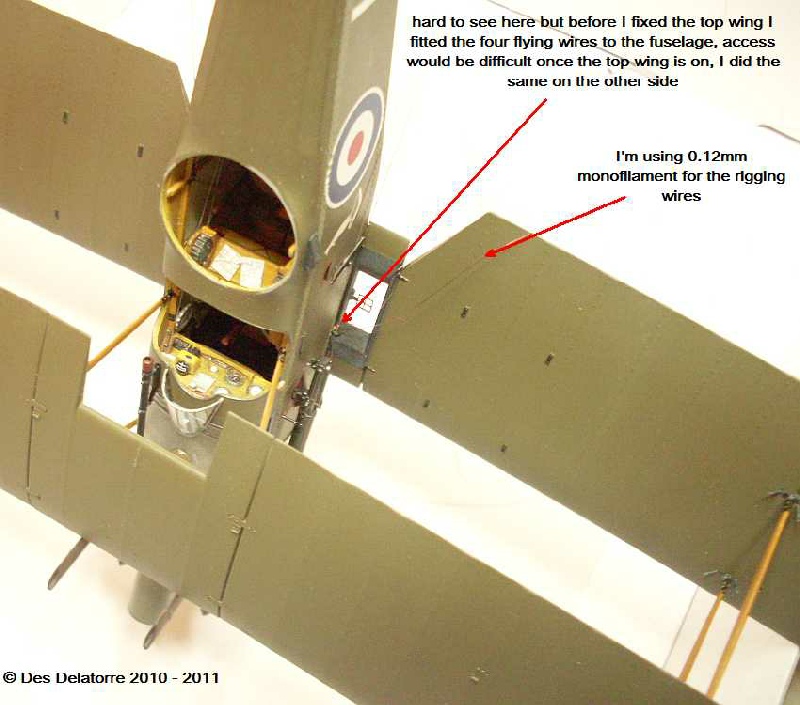
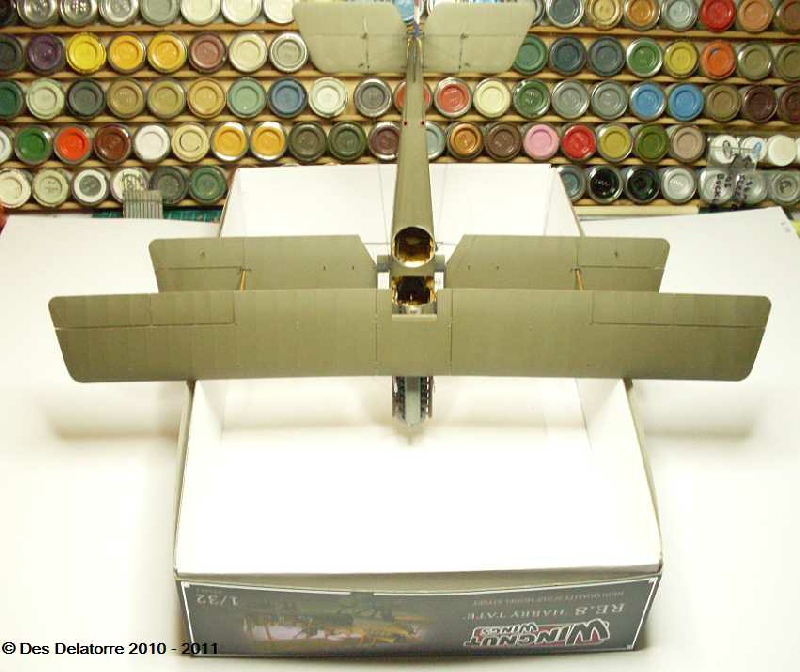
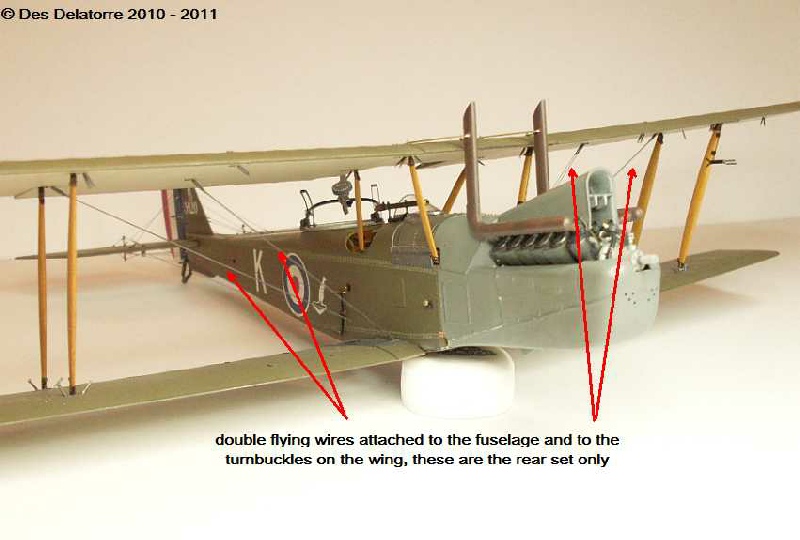
It is a good idea to attach the four (8) flying wires to the side of the fuselage before the top wing is fitted, access to this area would be difficult once the wing is fitted. I fitted the top wing by inverting the aeroplane and placing it onto the top wing, make sure you have cleaned all traces of paint from the strut locating holes in the top wing, also remove all paint from the pegs on top of the struts, if this has been done properly the struts slip into the holes easily. I used the suggestion made by Wingnut Wings in the instructions and that is to place the model on the kit box once the wing is glued, this aligns the two wings perfectly, leave it in this position until the glue is fully cured. I will be using 0.12mm monofilament for the rigging with 0.3mm brass sleeves, it will be held together with CA. The top wing fitted very easy with good alignment with the struts.
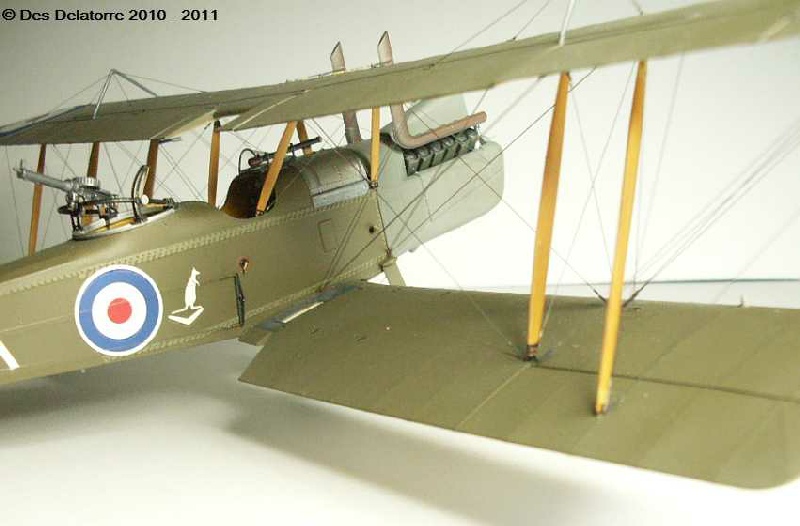
The glue is set and the top wing is mounted permanently. I replaced the exhaust stack stays with 0.4mm brass tube, they add a great deal of strength to the wing assembly, they were bent to the correct angle to fit into the stacks. I flattened the end that sits on the wing, drilled a 0.4mm hole and fitted small Grandt Line nuts, these now simulate the mounting brackets and mounting bolts, they will be painted black. The lines you can see tracing back are for the double flying wires mounted to the fuselage as mentioned earlier, these will be the first rigging wires I will attach.
I connected the 8 flying wires which I pre-
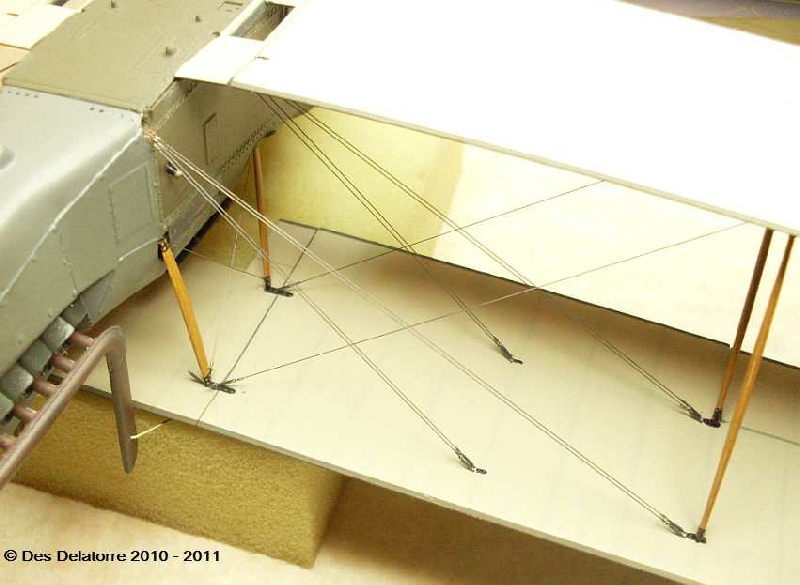
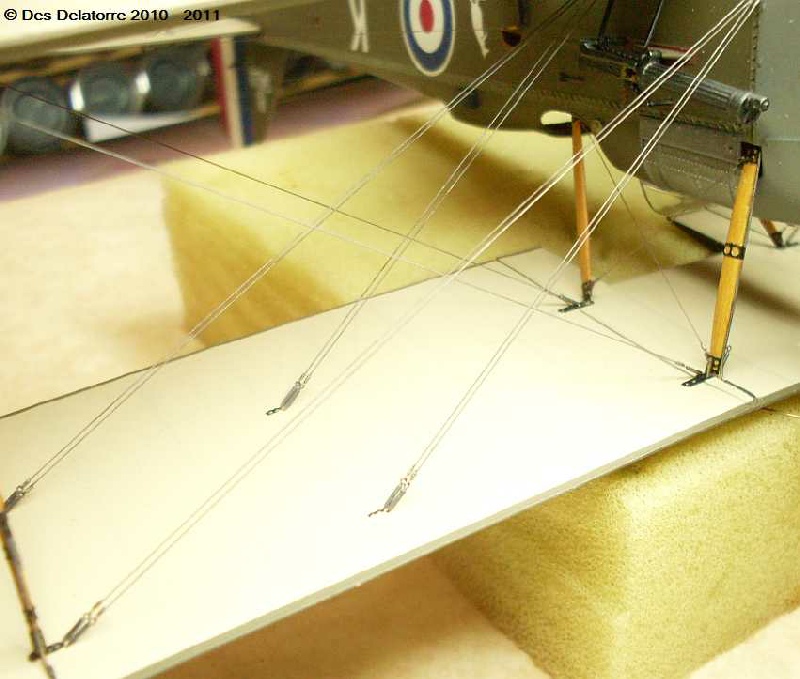
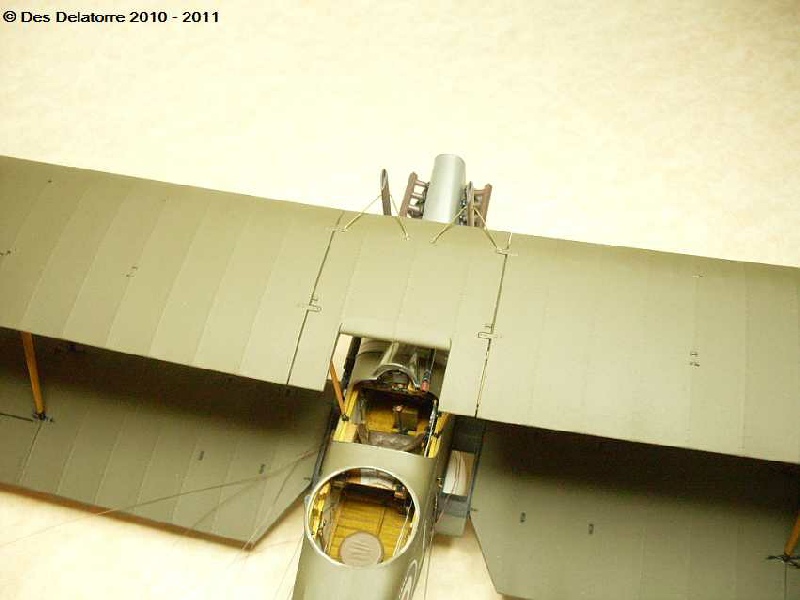
The wing rigging is well under way, I have completed the rigging inboard of the interplane struts, I still need to add the drag wire which connects to the engine bearers. I am using 0.12mm Chameleon coloured monofilament, 0.4mm brass sleeves and CA to hold it together. Once each wire was fitted I painted it with Mr Metal Color 213 Stainless, it is easier to paint each line individually instead of trying to paint around a fully rigged model. I did most of the rigging with the model inverted and sitting on a piece of soft foam, good lighting is essential for rigging. The wing mounted turnbuckles pull into alignment with the rigging wires once a small amount of weight is applied. The rigging technique I use is quite simple, just a little time consuming and sometimes tedious.
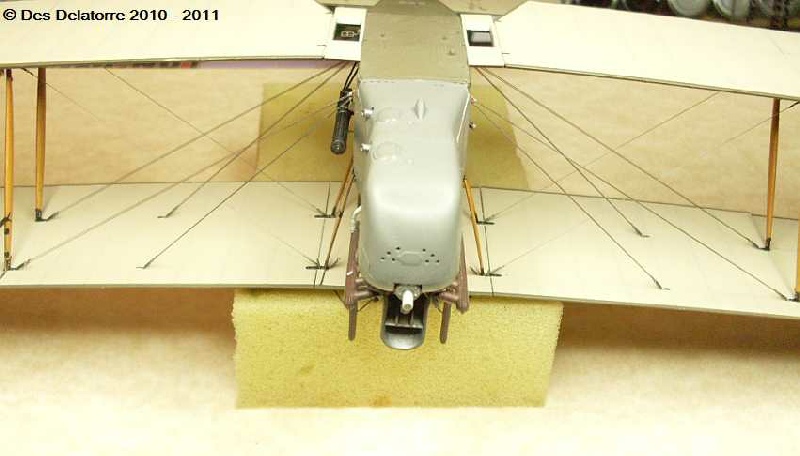
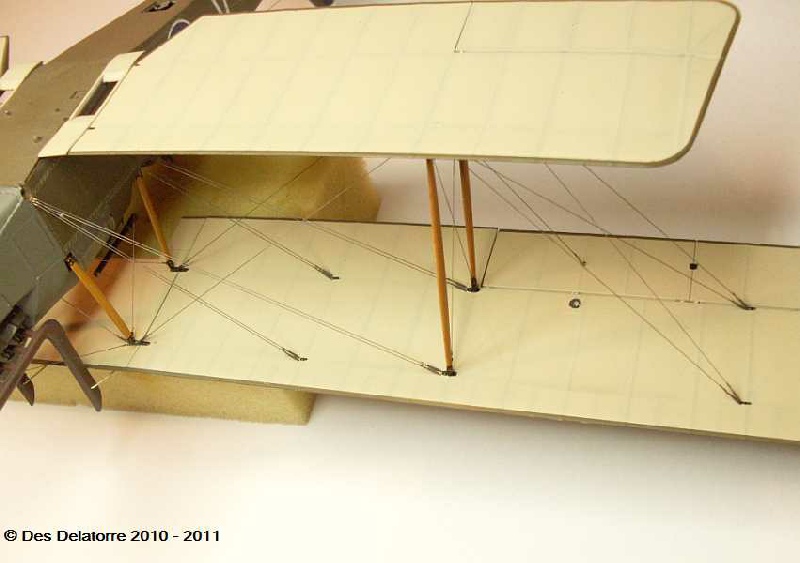
The majority of the wing rigging has now been completed, it has been a long task as there is quite a bit of rigging. I will be doing the undercarriage next.

The undercarriage is now fitted. The fitment of the undercarriage was a very simple task, Wingnuts made sure of that by incorporating large, strong and perfectly aligned locating pins and holes, once the glue had set and the rigging was attached it is a very strong unit and supports the model easily.
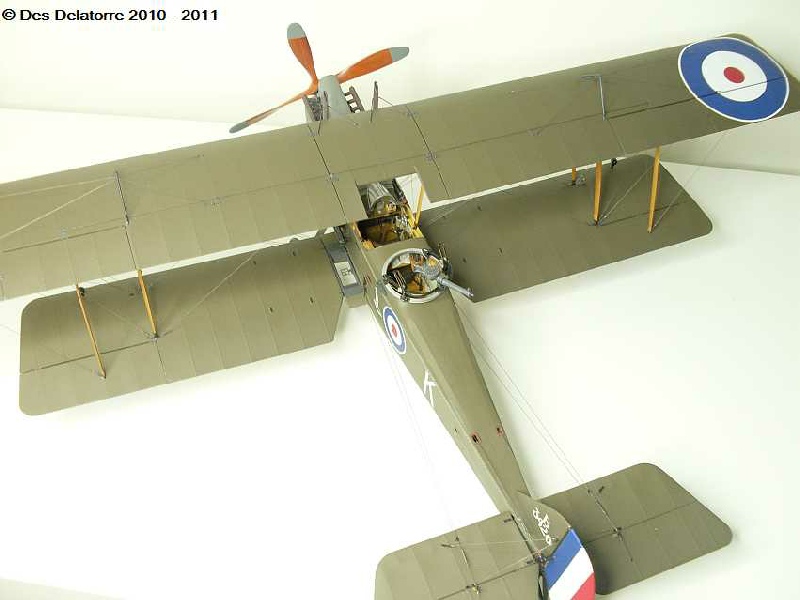
Top and bottom wing decals are now fitted and as with all the decals supplied by Wingnuts they are superb, they adhere very well and settle down nicely over all the lumps and hollows. I have sprayed the decals with Humbrol Matt Cote, this gives a very nice semi satin finish and protects the decals.
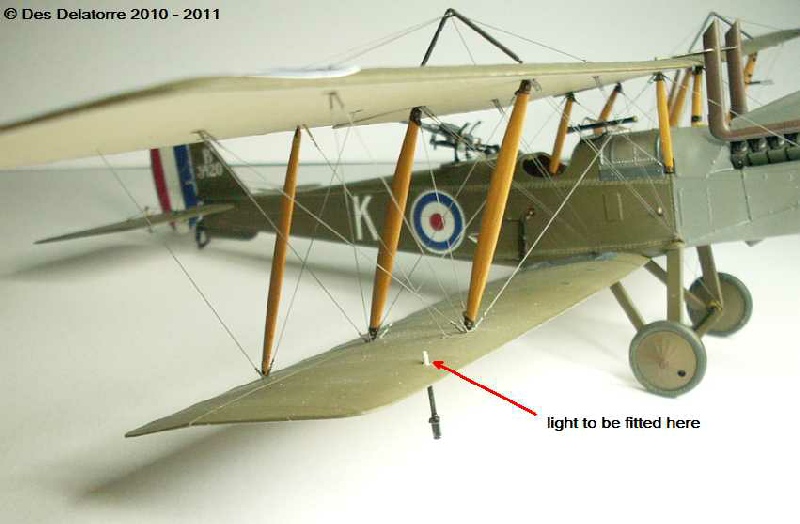
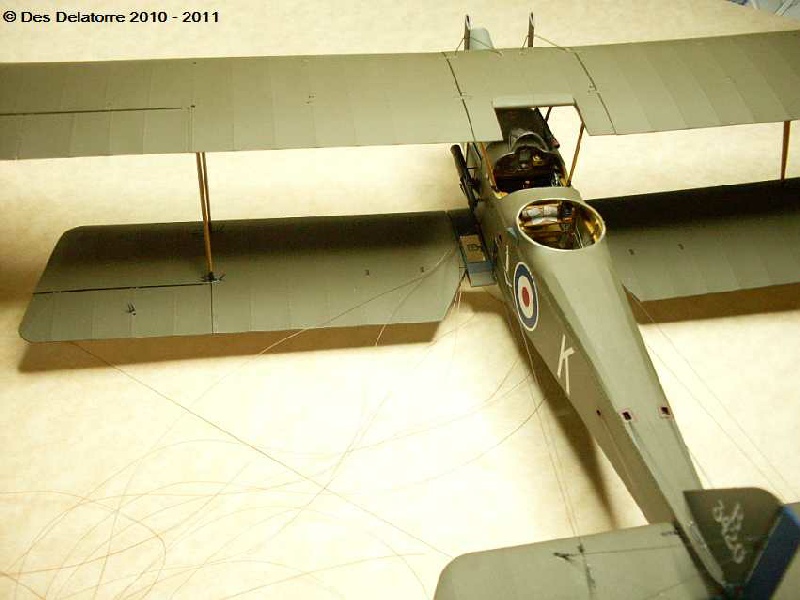
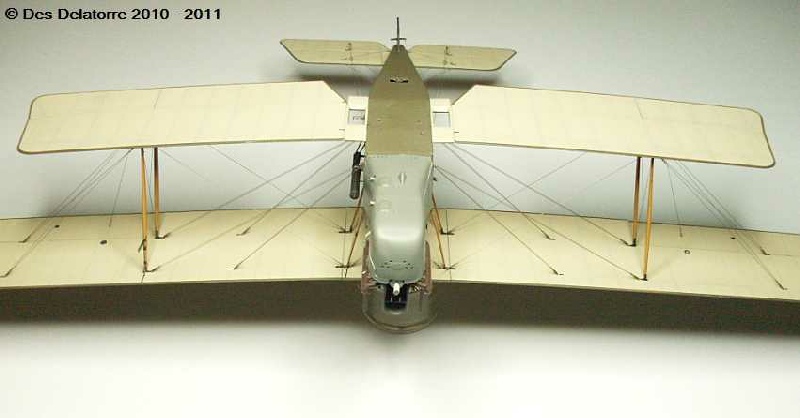
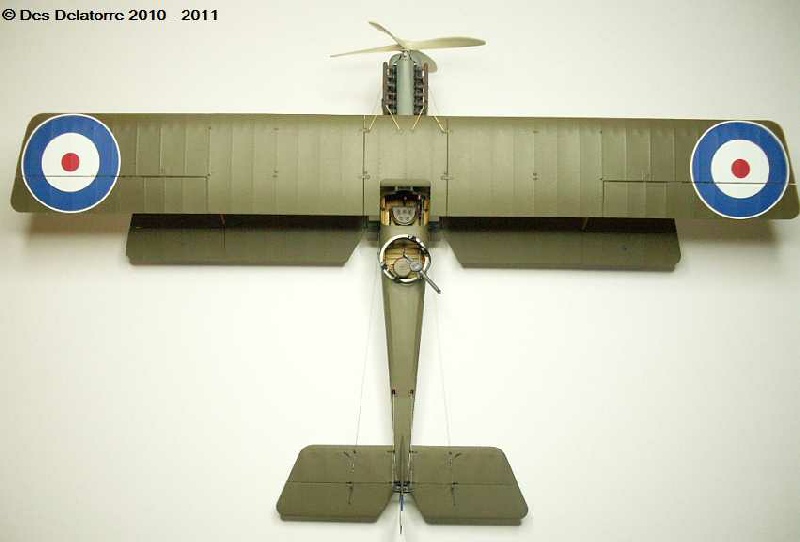
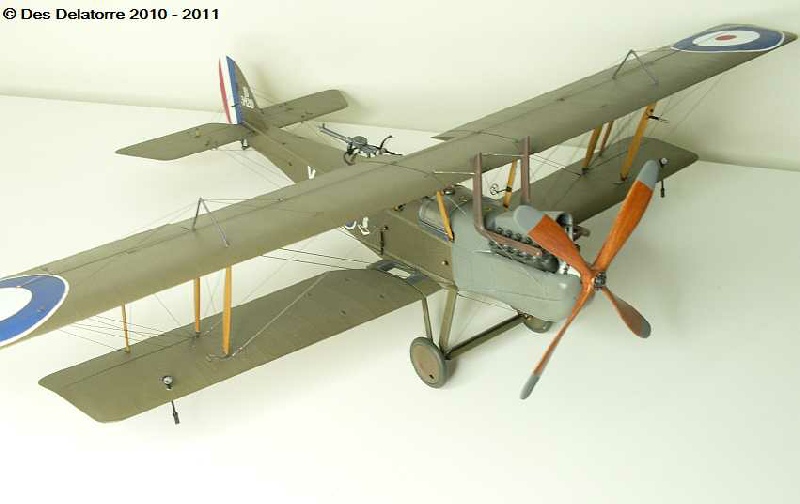
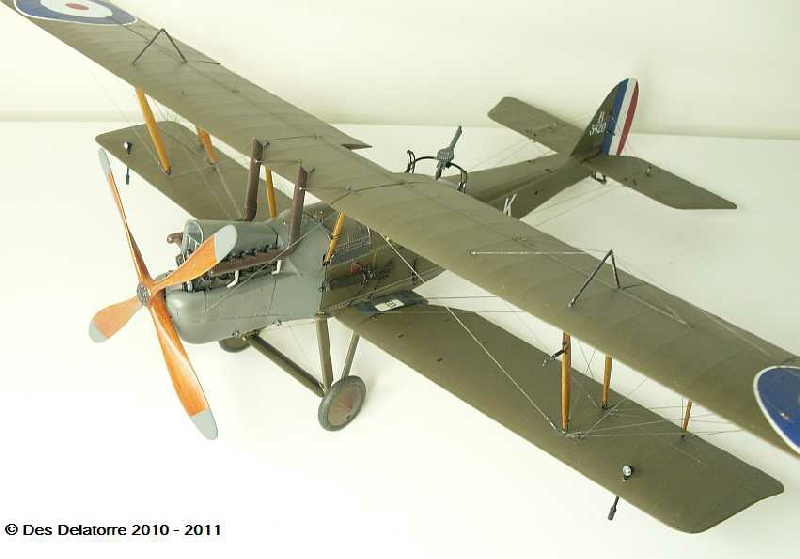
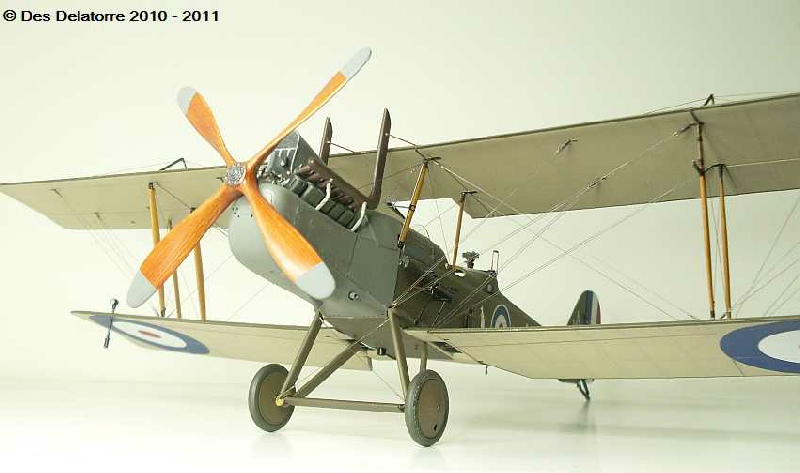
All the rigging is now completed, the rigging on top of the top wing was the last to be fitted. The two lights still need to be fitted to the bottom wing. The propeller is in the heat box drying, I used oil paints over an acrylic base so it will take a day or two to dry.
The end is near. The propeller tips need to be painted a light grey. I sprayed the prop with Humbrol Satin Cote, just waiting for it to dry before the model can be completed. The wing lights are also fitted.
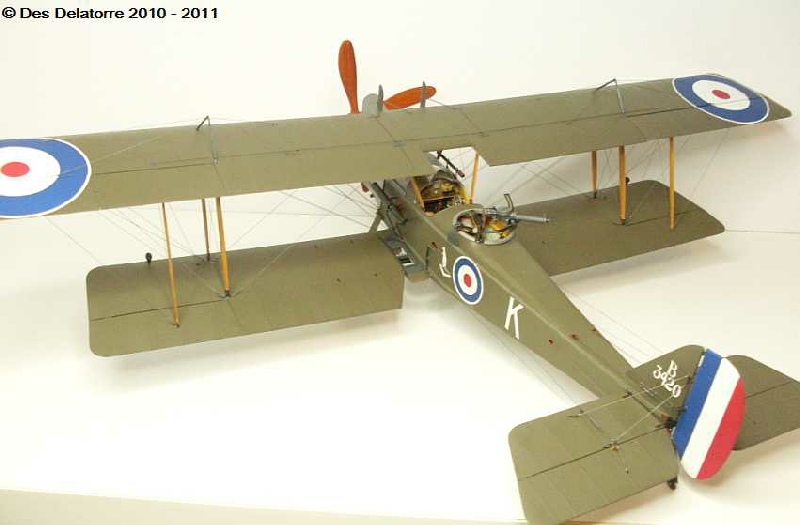
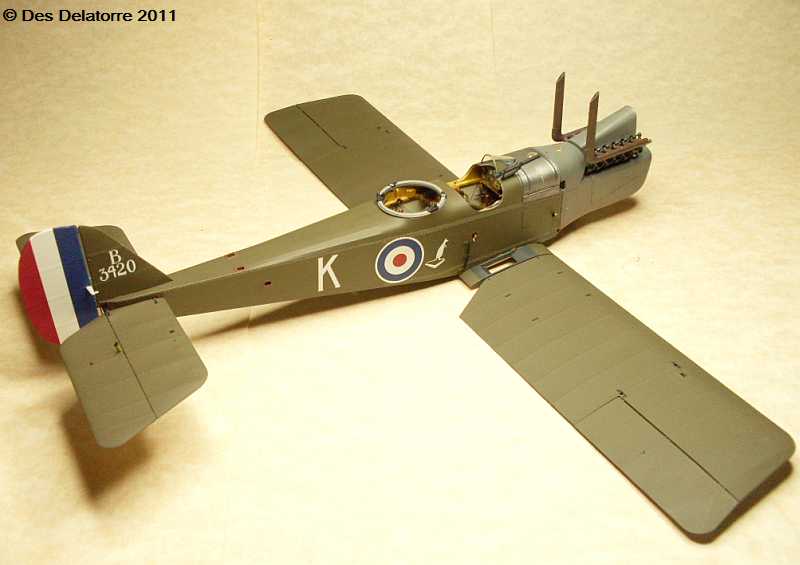
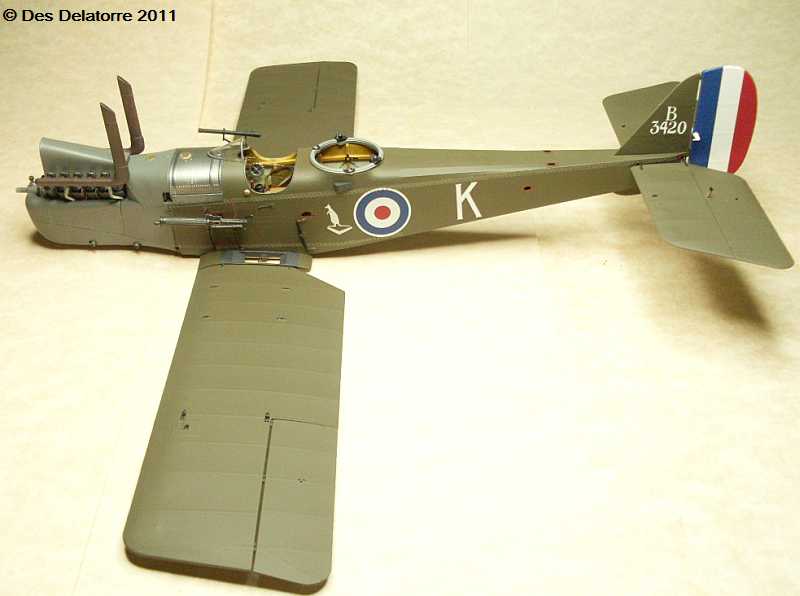
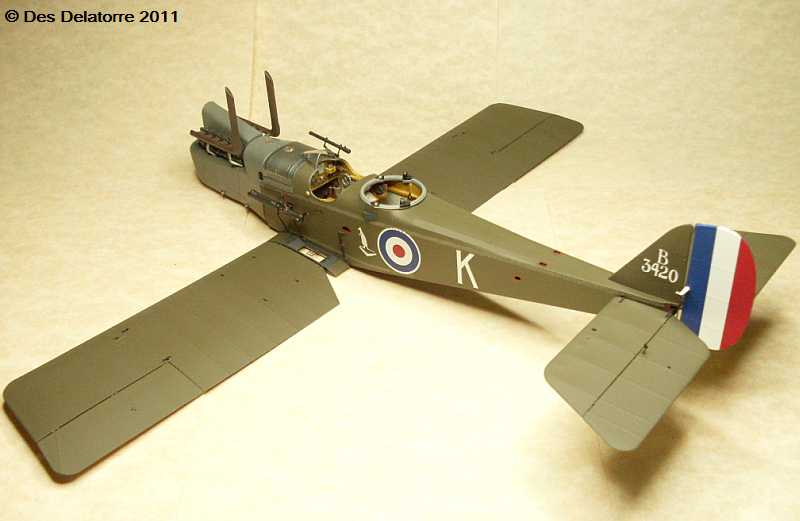
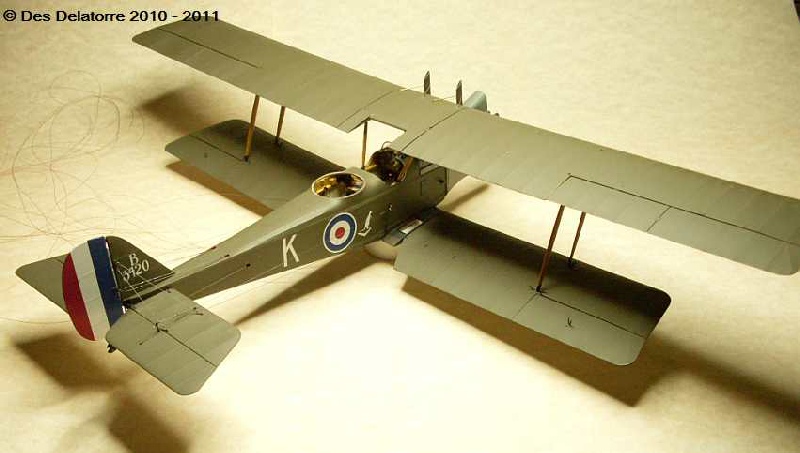
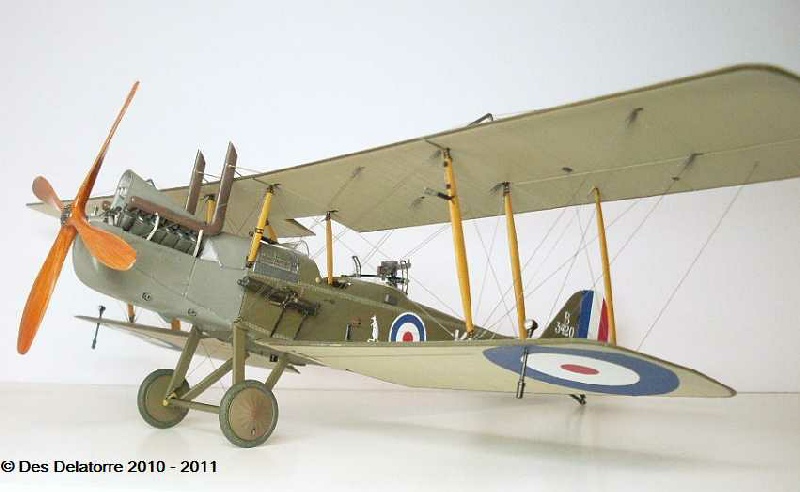
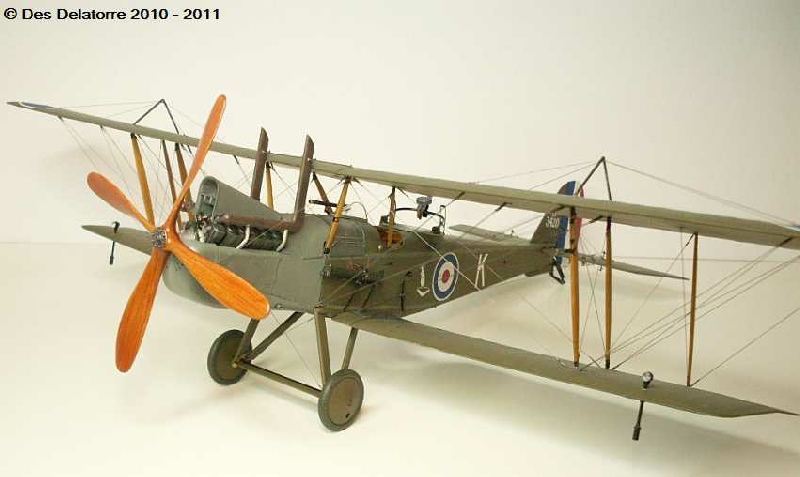
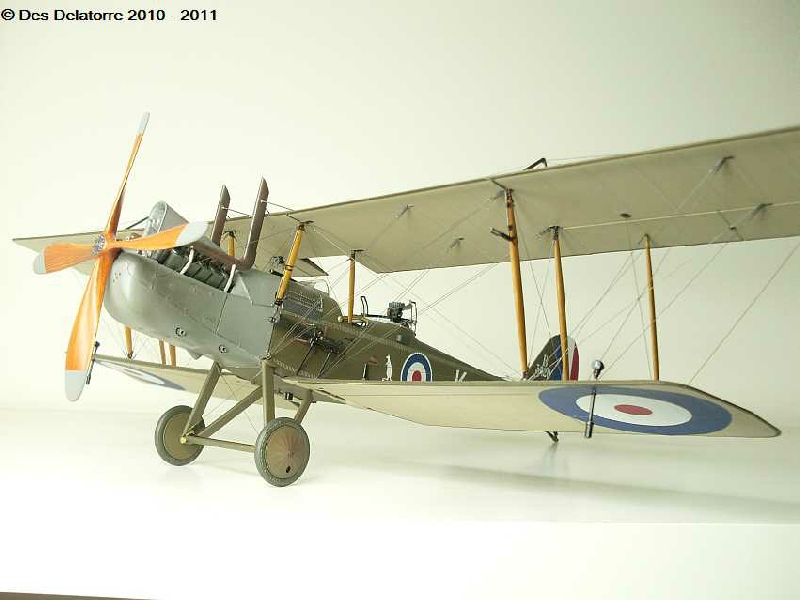
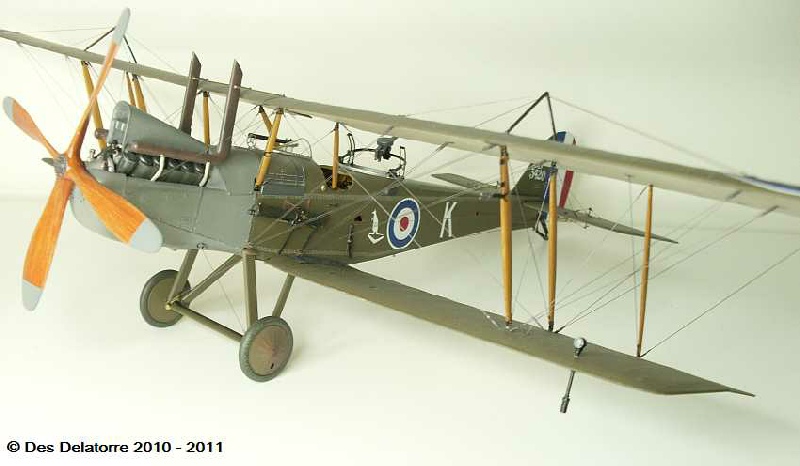
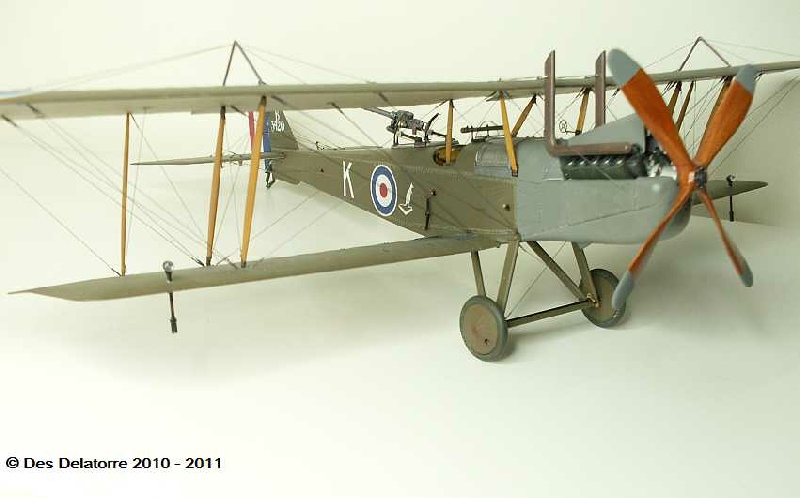
Completed
This model has been a complete joy to build, Wingnut Wings have again produced a brilliant kit, very well detailed and easy to assemble. As said earlier, tolerances are tight so paint removal is essential before joining parts, rigging holes are very shallow and need drilling deeper and no rigging material is supplied with the kit. I would recommend this kit to anyone who has moderate to advanced modeling skills. The wing rigging is quite complex so some experience in this area would be advantageous, the addition of turnbuckles adds more realism.
If you have any questions regarding this build please feel free to contact me at
info@ww1aircraftmodels.com